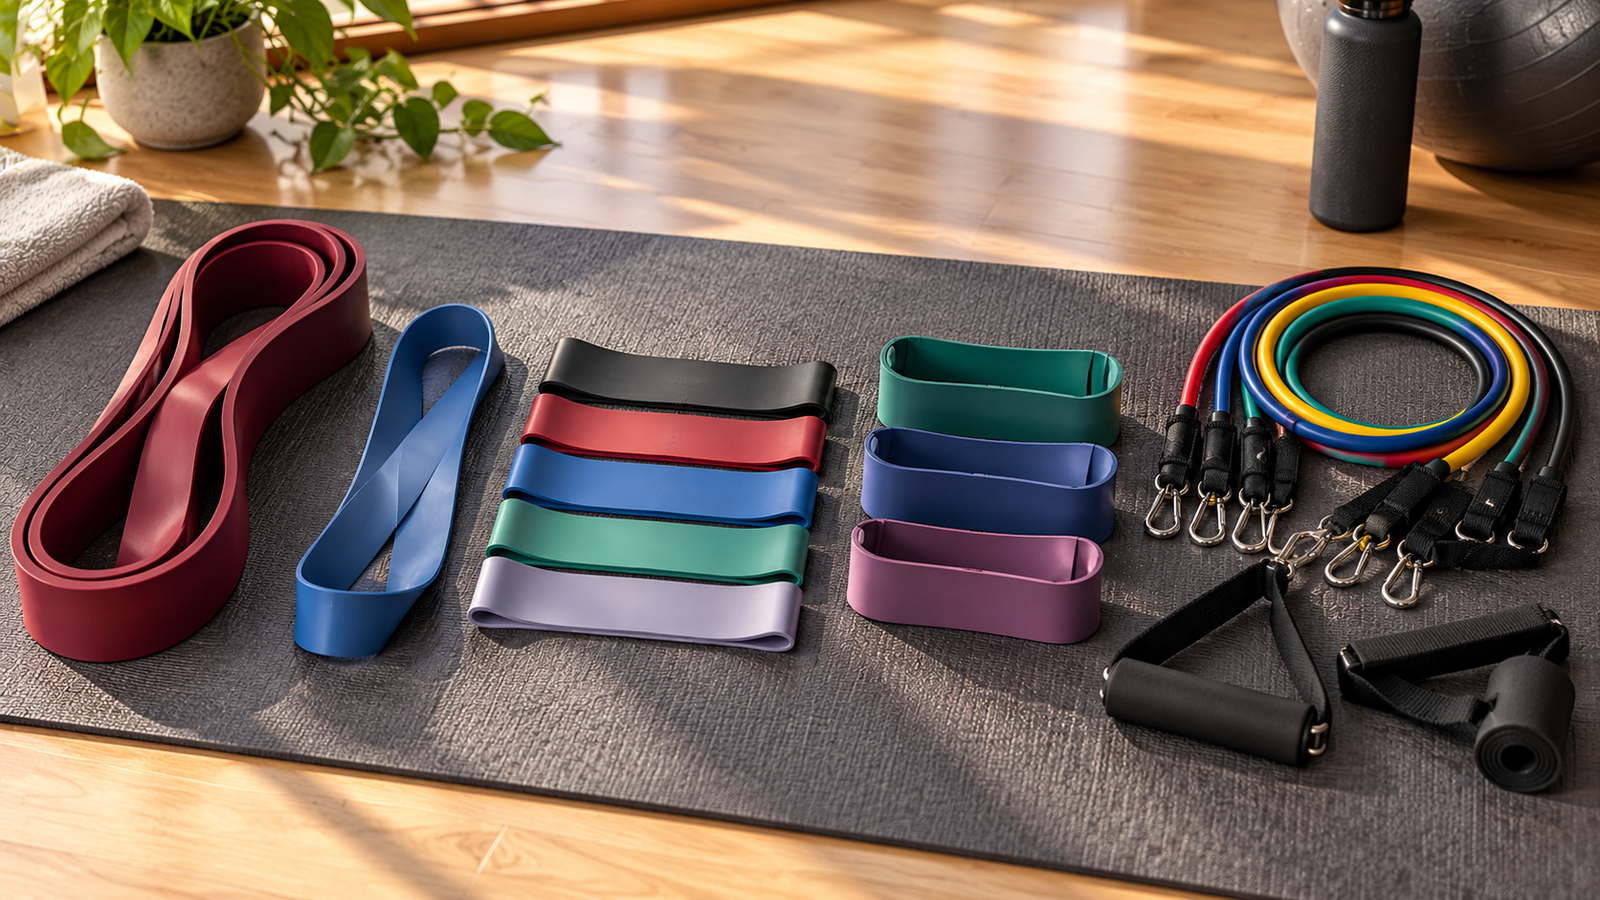
Mini Loop Resistance Band Care: Stretch Limits and Early Wear Signs
Mini loop resistance bands are among the most compact fitness accessories available for home workouts. They take up very little space, require no electricity and can be used for controlled resistance exercises targeting different muscle groups.
Whether you use a single mini loop band or a set containing three to five resistance levels, proper maintenance is essential.
Unlike metal weights, elastic resistance bands depend on the condition of their material. Repeated stretching, sharp objects, rough surfaces, excessive heat and improper storage can damage the bands over time.
A band that looks normal from a distance may already have small cuts or weakened areas that increase its risk of breaking during exercise.
Inspecting resistance bands before every workout, respecting their specified stretch limits and storing them correctly can help reduce preventable equipment failures.
This guide explains how mini loop bands work, what causes premature wear, how to identify damage and when you should replace a resistance band rather than continue using it.
1. What Are Mini Loop Resistance Bands?
Mini loop resistance bands are short, continuous elastic loops used to provide resistance during exercise.
Unlike long resistance bands, they usually do not have separate handles or attachment clips.
They are commonly positioned around the thighs, lower legs or other areas according to a specific exercise.
Mini loops are used in activities such as:
- Lateral band walks
- Glute bridges
- Clamshell exercises
- Controlled hip-abduction movements
- Selected lower-body warm-ups
- Other manufacturer-approved resistance exercises
Their compact size makes them convenient for training at home or carrying in a gym bag.
However, their short length also means users must pay attention to how far the band is stretched.
A mini loop should never be stretched beyond the limit specified by its manufacturer simply to make an exercise more challenging.
2. How Do Resistance Bands Create Resistance?
Resistance bands work by resisting deformation.
When you stretch an elastic band, it produces a force that opposes the stretching movement.
As the band becomes longer, its resistance generally increases, although the exact force-extension relationship depends on the material and construction.
This is different from lifting a conventional fixed-weight dumbbell.
With a dumbbell, the mass remains constant throughout the movement.
With an elastic band, the resistance changes as the band stretches.
Why resistance changes during exercise
Imagine performing a lateral band walk with a loop positioned around your legs.
As your legs move farther apart, the band stretches.
The resistance may increase as the distance between your legs increases.
When you bring your legs closer together, the band shortens and the resistance decreases.
This variable resistance is one reason mini loops can be useful for controlled strengthening exercises.
However, greater stretch does not automatically mean better exercise technique or better training results.
Stretching the band excessively may increase the mechanical load on the material and the risk of failure.
3. What Is the Maximum Safe Stretch for a Mini Loop Band?
There is no single maximum stretch distance that applies to every resistance band.
Different manufacturers use different materials, construction methods and safety specifications.
For example, some resistance band manufacturers limit stretching to twice the resting length.
Other products, including certain therapy bands, have guidance permitting stretching up to three times the resting length.
These limits are product-specific.
Why you should not use one universal stretch rule
A small latex mini loop, a long pull-up assistance band and a fabric hip-resistance band may have very different construction and operating limits.
Their safe working ranges should not be assumed to be identical.
| Band format | Main consideration |
|---|---|
| Latex mini loop | Material condition and specified stretch limit |
| Rubber exercise loop | Elasticity, thickness and manufacturer instructions |
| Fabric-covered hip band | Fabric, stitching and internal elastic condition |
| Long pull-up assistance band | Approved stretch range and anchor security |
| Resistance tube with handles | Tube condition, connectors and attachment points |
Example: Understanding stretch limits
Suppose a manufacturer specifies that a straight resistance band must not exceed twice its resting length.
If the band measures 30 cm at rest, that manufacturer’s stated limit would correspond to a total stretched length of 60 cm.
However, a closed mini loop is measured differently from a straight strip.
Do not automatically apply this example to the circumference, folded length or diameter of your mini loop.
Follow the measurement method specified by the manufacturer.
Can you stretch a band until it feels extremely tight?
That is not a reliable safety test.
A band may feel strong while approaching or exceeding its intended working range.
If you need greater resistance, select an appropriately rated band rather than overstretching a lighter one.
4. Why Mini Loop Resistance Bands Wear Out
Elastic bands experience repeated mechanical stress during use.
Each exercise stretches and relaxes the material.
Over time, the band may develop signs of wear.
Several factors can accelerate this process.
Repeated stretching
Normal use causes repeated deformation.
Resistance bands are designed for this, but they do not have an unlimited service life.
Heavy usage can eventually contribute to material fatigue.
Excessive stretching
Pulling the band beyond its permitted range can place additional stress on the material.
It may lead to permanent deformation or damage.
Sharp objects
Rings, fingernails, shoe edges and other sharp surfaces can create small cuts.
Even a small nick can become a weak point when the band is stretched.
Rough surfaces
Dragging a band against rough flooring, exposed concrete or abrasive equipment can damage its surface.
Heat and sunlight
Exposure to excessive heat and direct sunlight can degrade some elastic materials.
This is particularly important for bands stored in hot vehicles, balconies or areas receiving strong sunlight.
Improper storage
Twisting, stretching or compressing bands against sharp objects during storage can contribute to damage.
The exact effects depend on the band material and construction.
5. Early Warning Signs That a Resistance Band Needs Replacement
One of the most important safety habits is inspecting your bands before exercising.
Manufacturer guidance from THERABAND and other resistance equipment companies emphasizes checking for wear, tears and other visible damage.
Common warning signs
| Warning sign | What it may indicate | Recommended action |
|---|---|---|
| Small tear or cut | Localized structural damage | Replace the band |
| Visible crack | Material deterioration | Replace the band |
| Puncture or hole | Compromised elastic material | Replace the band |
| Frayed fabric edge | Fabric wear or possible structural damage | Stop using; replace if integrity is uncertain |
| Exposed or broken elastic strands | Structural deterioration | Replace the band |
| Unusual permanent stretching | Possible loss of elasticity | Stop using and assess against manufacturer guidance |
| Localized thinning | Uneven material condition | Replace the band |
| Persistent abnormal stickiness | Possible contamination or deterioration | Clean only as directed; replace if deterioration is suspected |
| Surface discoloration alone | May be cosmetic aging | Check the manufacturer’s guidance and inspect for other damage |
Never continue using a band that has a visible tear, puncture or crack.
Attempting to repair a damaged resistance band with tape, glue or knots is not a safe substitute for replacement unless the manufacturer explicitly provides an approved repair method.
Why even small cuts matter
A tiny cut may not seem serious when the band is relaxed.
However, stretching concentrates mechanical stress around damaged areas.
This can allow a small defect to grow into a larger tear.
The band may then fail unexpectedly during exercise.
The safest approach is to replace visibly damaged bands before your next session.
6. How to Inspect Mini Loop Bands Before Every Workout
A basic inspection takes little time and can help identify problems before the band is placed under tension.
Step 1: Examine the entire loop
Hold the band in a relaxed position.
Look along its full circumference for cuts, cracks, holes or unusual wear.
Pay particular attention to the edges.
Step 2: Check the surface
Look for abrasions, thinning areas or changes in the material.
For latex or rubber loops, check whether the surface feels unusually brittle or damaged.
Step 3: Inspect fabric construction
If your band has a woven fabric covering, inspect its seams and stitching.
Look for fraying, damaged elastic strands or separated sections.
Step 4: Check for deformation
Compare the relaxed shape with the band’s normal condition.
An abnormally stretched, twisted or distorted band may no longer behave as intended.
Do not deliberately stretch a questionable band to determine whether it breaks.
Step 5: Check your exercise area
Inspect the surrounding floor and equipment.
Remove sharp objects and avoid abrasive surfaces.
Step 6: Confirm appropriate resistance
Choose a band that allows controlled movement without requiring excessive stretching.
If anything about the band’s condition is uncertain, replace it rather than risk using compromised equipment.
7. Does Band Color Indicate Resistance Strength?
Many mini loop sets include bands in different colors.
For example, a set may contain three or five colors representing different resistance levels.
However, there is no universal color system that applies to every resistance band manufacturer.
A green band from one company is not necessarily equivalent to a green band from another.
What should you check instead?
Look for:
- Manufacturer-defined resistance level.
- Product-specific resistance range.
- Material and dimensions.
- Stated force at a particular extension, where available.
- Instructions for selecting the appropriate band.
Why resistance labels can be misleading
Some products advertise resistance using kilograms or pounds.
However, these values may refer to force under particular testing conditions rather than the band’s physical weight.
Resistance depends on how far the band is stretched.
For example, a band advertised as providing 10 kg of resistance does not necessarily generate that force throughout every exercise.
The actual force may vary with extension.
Do not compare resistance numbers from different brands unless their measurement conditions are known and comparable.
8. Latex vs Fabric Mini Loop Bands: Care Differences
Mini loop bands commonly use latex, synthetic rubber or fabric combined with elastic material.
Each construction has different care requirements.
Latex resistance bands
Latex bands are usually lightweight, thin and highly elastic.
Their advantages may include compact storage and a wide range of resistance options.
However, they can be damaged by sharp objects, excessive stretching and unsuitable storage conditions.
For many latex products, manufacturers recommend cleaning with mild soap and water and drying thoroughly.
Synthetic rubber bands
Some bands use synthetic materials instead of natural rubber latex.
Their handling requirements depend on the exact material.
A latex-free label does not necessarily mean the product is resistant to all environmental conditions.
Follow its care instructions.
Fabric resistance bands
Fabric-covered bands may provide a different feel and can be less prone to rolling during some exercises.
However, fabric construction introduces other areas to inspect.
Check:
- Stitching.
- Seams.
- Internal elastic strands.
- Worn fabric surfaces.
- Separation between material layers.
Fabric bands should not automatically be treated as machine-washable.
Their internal elastic components may require specific cleaning methods.
Care comparison
| Care factor | Latex or rubber loop | Fabric-covered loop |
|---|---|---|
| Main wear areas | Edges, cuts and surface cracks | Seams, stitching and elastic fibers |
| Cleaning | Often mild soap and water | Follow the specific fabric-care label |
| Drying | Usually air-dry | Usually air-dry unless directed otherwise |
| Heat exposure | Avoid excessive heat | Avoid temperatures beyond product guidance |
| Storage | Relaxed, away from sunlight | Clean, dry and without excessive compression |
| Replacement | Tears, cracks or structural damage | Damaged seams, exposed elastic or structural wear |
9. How to Clean Mini Loop Resistance Bands
Cleaning helps remove sweat, dirt and surface residue.
However, improper cleaning may damage the material.
Cleaning latex or rubber bands
For bands whose manufacturer permits washing:
- Inspect the band for visible damage.
- Prepare water with a small amount of mild soap.
- Gently wipe or wash the band according to its instructions.
- Rinse away cleaning residue if recommended.
- Allow the band to air-dry completely.
- Store it only after drying.
THERABAND’s product-care guidance recommends mild soap and water for many of its resistance products, followed by thorough rinsing and air-drying.
Cleaning fabric bands
Follow the manufacturer’s instructions.
If hand cleaning is permitted, use an appropriate gentle method.
Do not assume fabric bands can be placed in a washing machine or dryer.
What cleaning products should you avoid?
Unless specifically approved by the manufacturer, avoid:
- Bleach.
- Strong solvents.
- Petroleum-based cleaning chemicals.
- Harsh abrasive scrubbers.
- Excessively hot water.
- Unapproved disinfectants.
- High-temperature drying.
Some products also have special maintenance instructions.
For example, certain latex band manufacturers recommend particular powders or surface treatments.
Do not apply talcum powder, oils, lubricants or other substances unless they are appropriate for your specific product.
10. How to Store Resistance Bands Correctly
Storage is one of the easiest ways to reduce unnecessary wear.
Mini loop bands are small enough to fit into almost any drawer or gym bag, but not every storage location is suitable.
Keep them away from direct sunlight
Manufacturers commonly recommend storing elastic resistance products away from direct sunlight.
Prolonged exposure can contribute to degradation of some materials.
Choose a shaded indoor storage location.
Avoid excessive heat
Do not leave bands in areas where temperatures may become excessive, such as a parked vehicle in hot weather.
Follow the manufacturer’s specified storage temperature limits, if provided.
Store them dry
Allow bands to dry after cleaning or sweaty workouts.
Avoid storing damp bands inside a tightly closed pouch for extended periods.
Keep them away from sharp objects
Do not place them loose among keys, scissors, metal clips or tools that may cut the material.
Avoid unnecessary tension
Store the bands in a relaxed position unless the manufacturer recommends otherwise.
Do not leave them stretched around furniture or equipment between workouts.
Use a dedicated pouch
A clean storage pouch or compartment can help separate the bands from abrasive objects.
The pouch should not trap moisture around damp equipment.
11. Can Resistance Bands Be Damaged in a Gym Bag?
Yes.
A gym bag may contain objects that can damage elastic products.
Common examples include:
- Keys.
- Metal water-bottle edges.
- Weightlifting accessories.
- Zippers.
- Sharp grooming tools.
- Rough equipment surfaces.
A mini loop band placed directly against a hard metal accessory can experience unnecessary abrasion.
Better packing habits
Keep the bands inside a separate soft pouch.
Make sure the bands are dry before packing them.
Do not force them into an overcrowded pocket containing sharp objects.
Avoid leaving the entire gym bag in an excessively hot location.
These simple habits can help protect equipment during everyday storage and transport.
12. How to Prevent Resistance Bands from Rolling or Slipping
Some mini loops roll, bunch or slide during movement.
This can be uncomfortable and may interfere with exercise technique.
Rolling does not necessarily mean the band is defective.
It may relate to the band’s width, material, positioning or the movement being performed.
Choose an appropriate band width
Some wider bands are designed to reduce rolling during certain lower-body exercises.
However, width alone does not guarantee stability.
Position the band correctly
Follow the intended exercise instructions.
Do not place bands directly over sensitive areas if the exercise guidance specifies another position.
Avoid excessive stretching
A band that is too short or too strong for a particular movement may be difficult to control.
Choose resistance appropriate to your movement range.
Maintain controlled movement
Move slowly and avoid suddenly pulling the legs apart or allowing the band to snap back.
Consider clothing and surface contact
The interaction between the band, clothing and skin can affect slippage.
Choose a setup that remains secure without excessive compression.
Do not solve band slippage by tying excessively tight knots around your limbs.
13. Are Mini Loop Bands Safe Around the Knees?
Mini loops are commonly used around the thighs during lower-body exercises.
For certain movements, a band may be positioned just above the knees.
However, this does not mean it should be placed directly over the kneecaps or tightened excessively.
Correct positioning depends on the exercise and the user’s needs.
Check circulation and comfort
A band should not cause numbness, tingling, unusual pressure or discoloration of the skin.
Stop the exercise if these symptoms occur.
Avoid uncontrolled knee movement
Use a resistance level that allows you to maintain the intended movement pattern.
Do not choose an excessively strong band that forces you to compensate with poor technique.
Do not confuse exercise bands with blood-flow restriction equipment
Ordinary mini loop resistance bands are not designed to replace specialized blood-flow restriction cuffs.
Deliberately restricting circulation with an ordinary elastic loop can be unsafe.
If you are recovering from an injury or using resistance bands as part of rehabilitation, follow your physiotherapist’s instructions.
14. Why You Should Never Release a Stretched Band Suddenly
A stretched resistance band stores elastic energy.
When released, it rapidly returns toward its relaxed length.
This can cause the band to strike the user or another person.
A sudden release may be especially hazardous near the face or eyes.
How to reduce snapback risk
- Maintain a secure grip or positioning throughout the movement.
- Keep the band away from sharp surfaces.
- Do not use a damaged band.
- Avoid directing a stretched band toward your face.
- Return slowly to the starting position.
- Ensure accessories and anchors are approved and securely attached.
- Maintain clear space around the exercise area.
Manufacturer guidance often recommends appropriate eye protection for exercises in which band failure or release could threaten the eyes.
Should you attach mini loops to a door?
Not automatically.
Mini loop bands are not necessarily designed for door-anchor exercises.
Only use a door anchor when the specific band, attachment and exercise are approved by the manufacturer.
Improvised attachments can slip, tear the band or cause equipment to become a projectile.
15. How Often Should Mini Loop Resistance Bands Be Replaced?
There is no universal replacement interval for every mini loop resistance band.
Useful lifespan depends on several factors:
- Material quality.
- Frequency of use.
- Stretching intensity.
- Storage conditions.
- Cleaning practices.
- Exposure to sunlight and heat.
- Surface abrasion.
- Manufacturer-specific replacement guidance.
Some manufacturers specify scheduled replacement intervals.
For example, TRX provides time-based replacement recommendations for certain exercise bands, while THERABAND emphasizes inspection and replacement when signs of wear appear.
Those instructions apply to the relevant products and should not be generalized to every brand.
Should you replace a band every six months?
Not necessarily.
A universal six-month rule is not supported for every resistance band format.
A lightly used, correctly stored band may remain suitable for longer, while a frequently used band may develop damage much sooner.
The correct approach is to follow manufacturer guidance and inspect the band before every use.
When should you replace the band immediately?
Replace it if you discover:
- A tear.
- A puncture.
- A crack.
- Exposed or broken internal elastic.
- Significant localized thinning.
- Structural seam failure.
- Other damage that makes its condition uncertain.
Do not continue using visibly damaged equipment simply because it is relatively new.
16. How to Make a Set of Three or Five Bands Last Longer
A multi-resistance set can be useful because you can select the band most appropriate for each exercise.
However, owning several bands does not automatically prevent wear.
Match resistance to the exercise
Use a lighter band for movements requiring a larger range when appropriate.
Use a stronger band only when it allows proper control within its permitted stretch range.
Avoid stretching lighter bands excessively
Do not attempt to create very high resistance by pulling a light band far beyond its intended extension.
Choose a suitable resistance level instead.
Inspect every band individually
Do not assume an entire set is safe because one band is in good condition.
Each band experiences different usage and wear.
Keep the set clean and dry
Store the bands in a protected location rather than leaving them scattered across the gym floor.
Replace individual damaged bands
If one band becomes damaged, do not continue using it merely to keep the set complete.
Replace the affected band with a compatible product.
17. Common Resistance Band Care Mistakes
Mistake 1: Ignoring small tears
A small defect can grow when the band is stretched.
Replace visibly damaged bands.
Mistake 2: Leaving bands in direct sunlight
Excessive sunlight and heat can contribute to elastic material deterioration.
Store bands according to the manufacturer’s instructions.
Mistake 3: Stretching a light band beyond its limit
More tension is not worth the risk of equipment failure.
Choose another resistance level.
Mistake 4: Dragging bands across rough flooring
Abrasive surfaces can damage the material.
Use a suitable exercise surface.
Mistake 5: Using harsh cleaning products
Unapproved chemicals may affect elastic materials.
Follow the manufacturer’s cleaning instructions.
Mistake 6: Storing wet bands in sealed bags
Allow cleaned or sweaty bands to dry before storage.
Mistake 7: Assuming every color means the same resistance
Color systems vary between manufacturers.
Check product-specific specifications.
Mistake 8: Repairing a torn band with tape
Adhesive tape does not restore the original strength of damaged elastic material.
Replace the band.
Mistake 9: Releasing the band suddenly
Snapback can cause injury, particularly when the band is stretched toward the face.
Keep movements controlled.
Mistake 10: Ignoring latex allergies
Natural rubber latex can trigger allergic reactions in susceptible individuals.
If you have a known latex allergy, select a suitable latex-free alternative and review its materials.
18. A Simple Pre-Workout and Post-Workout Care Routine
A consistent routine makes resistance band care easier.
Before every workout
- Examine the entire band for damage.
- Check seams or attachment points where applicable.
- Confirm that the band is appropriate for the planned exercise.
- Inspect the surrounding exercise area.
- Choose manageable resistance.
- Maintain controlled movement throughout the session.
During the workout
- Avoid overstretching.
- Keep the band away from sharp edges.
- Return to the starting position gradually.
- Stop immediately if the band slips, tears or behaves unexpectedly.
- Avoid exercises that direct a stretched band toward your face.
After the workout
- Inspect the band for new damage.
- Clean it if necessary and permitted.
- Allow it to dry completely.
- Store it in a relaxed position.
- Keep it away from excessive heat, sunlight and sharp objects.
This practical routine is generally more useful than attempting to predict a band’s remaining lifespan from its age alone.
19. Frequently Asked Questions
How long do mini loop resistance bands last?
Their lifespan varies with material, usage, stretching, storage and manufacturer guidance. Inspect the band before every workout and replace it when signs of damage appear.
Can resistance bands lose elasticity over time?
Yes. Elastic materials can change with repeated use, aging and environmental exposure. Significant permanent stretching or abnormal material behavior may indicate that replacement is appropriate.
Can I wash latex resistance bands with water?
Many manufacturers permit mild soap and water, followed by rinsing and air-drying. Follow the instructions for your particular product.
Can fabric resistance bands go in the washing machine?
Only if the manufacturer permits machine washing. Fabric-covered bands may contain elastic components or stitching that require gentler care.
Is it safe to use a resistance band with a small tear?
No. A visible tear can become a failure point when the band is stretched. Replace the damaged band.
Can I use a resistance band that has become sticky?
First review the manufacturer’s cleaning instructions. If the stickiness reflects suspected material degradation or persists abnormally, stop using the band and replace it.
Why does my mini loop band roll during exercise?
Rolling may relate to band width, material, placement or movement technique. Check the product’s intended positioning and choose a suitable resistance level.
Are fabric resistance bands more durable than latex bands?
Durability varies by construction and quality. Fabric bands can develop seam or elastic damage, while latex bands may develop tears or surface cracks. Neither category is immune to wear.
Can I store resistance bands in my car?
Long-term storage in a vehicle is generally undesirable because parked cars can experience excessive temperatures. Follow the manufacturer’s specified storage conditions.
Are resistance band colors standardized?
No. Resistance levels represented by particular colors can vary across brands and product lines.
Should I stretch a resistance band before exercising to loosen it?
Do not perform excessive stretching as a conditioning method unless the manufacturer specifically recommends it. Inspect the band and follow approved usage instructions.
Can I tie two mini loop bands together for more resistance?
Do not improvise connections that are not approved by the manufacturer. Knots and unsuitable attachments may create damage or unexpected failure points.
What should I do if a resistance band snaps during exercise?
Stop the activity. Check for injury and seek appropriate medical attention if needed. Dispose of the damaged band and inspect other equipment before resuming exercise.
Are latex-free resistance bands safer?
Latex-free bands are important for people with latex allergies. However, they still carry mechanical risks such as snapping, overstretching and material wear.
Can beginners use mini loop resistance bands?
Yes, when the chosen band and exercise are appropriate for the individual’s abilities. Beginners should start with manageable resistance, controlled movements and proper technique.
20. Final Takeaway
Mini loop resistance bands are convenient and versatile home fitness accessories, but their condition directly affects safe use.
The most important habits are inspecting bands before every workout, respecting manufacturer-specific stretch limits, avoiding damaging surfaces and storing them correctly.
Look carefully for tears, cracks, punctures, exposed elastic and other structural changes.
Do not assume that a band is safe simply because it is relatively new or still feels strong.
Likewise, do not assume that a particular color, resistance number or replacement interval applies to every manufacturer.
A correctly maintained resistance band can be a useful part of a consistent strength-training routine.
But when a band shows structural damage, replacement is the safer choice than attempting to repair it.
References and Further Reading
- THERABAND — Resistance Band Care and Safety Guidance
- TRX Training — Product Safety and Resistance Band Instructions
- Decathlon — Resistance Band Product Care and Storage
- Royal Devon NHS — Exercise Band Safety Advice (PDF)
- American College of Sports Medicine — Updated Resistance Training Guidelines (2026)
Editorial note: This article provides general fitness equipment education. It does not represent independent durability testing of any particular resistance band. Stretch limits, cleaning procedures and replacement intervals vary by manufacturer. Always follow the instructions supplied with your exact product. Seek guidance from a qualified healthcare professional if you are using resistance bands during injury rehabilitation or have medical conditions that affect exercise safety.