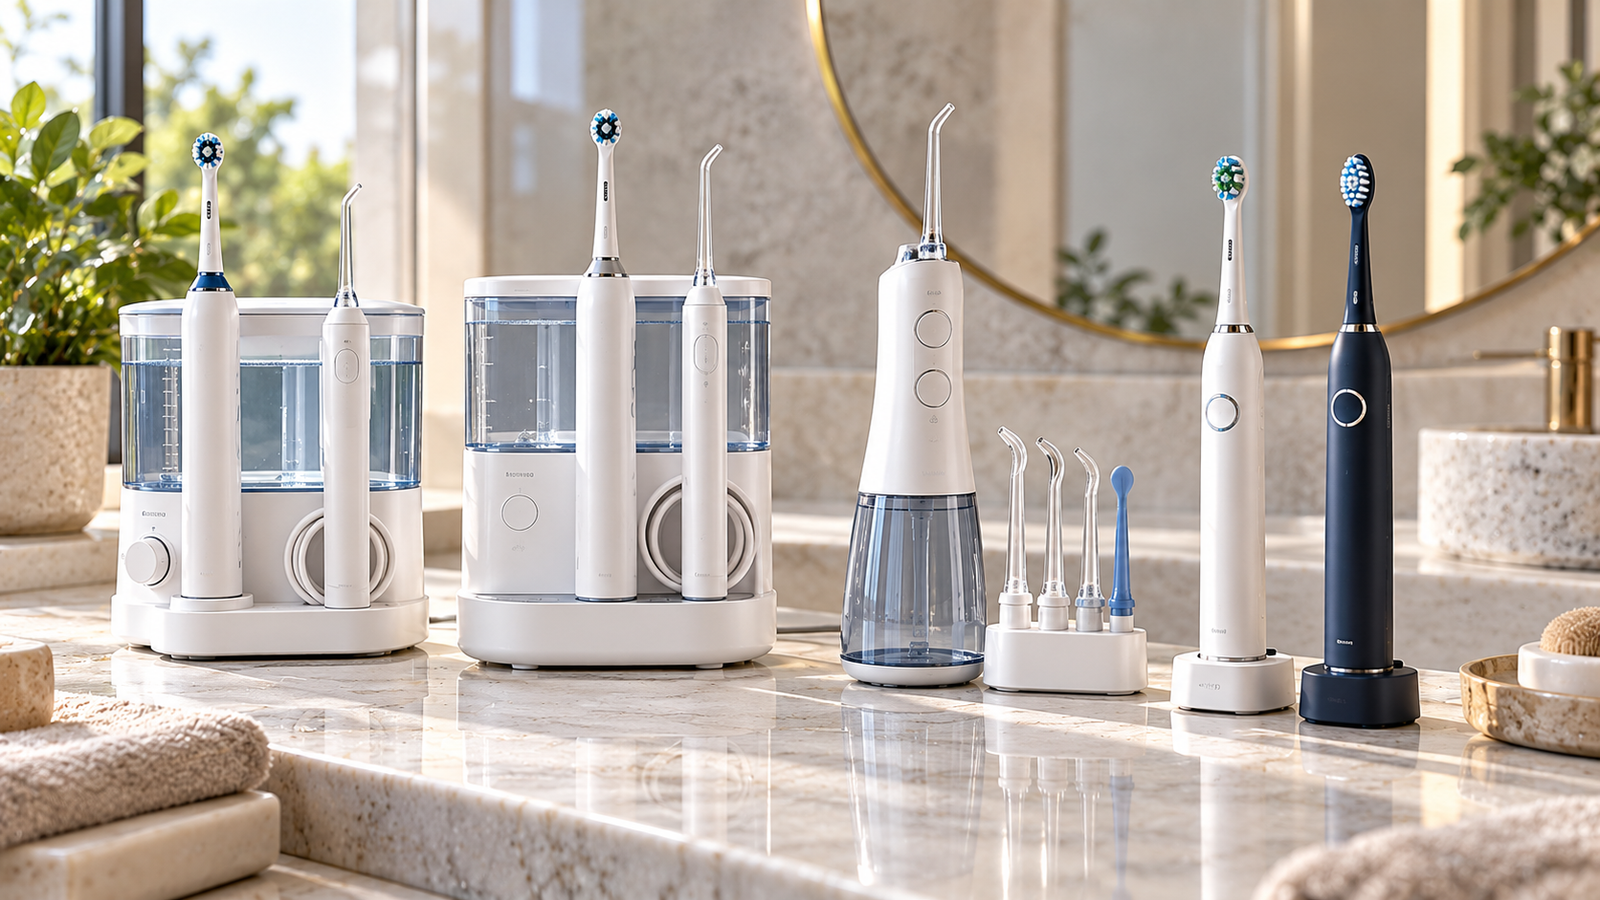
Water Flosser Cleaning: Reservoir, Tips and Drying Checklist
Water flossers are increasingly popular oral-care devices for cleaning between teeth and along the gumline. They use a directed stream of water to help remove food debris and support daily interdental cleaning.
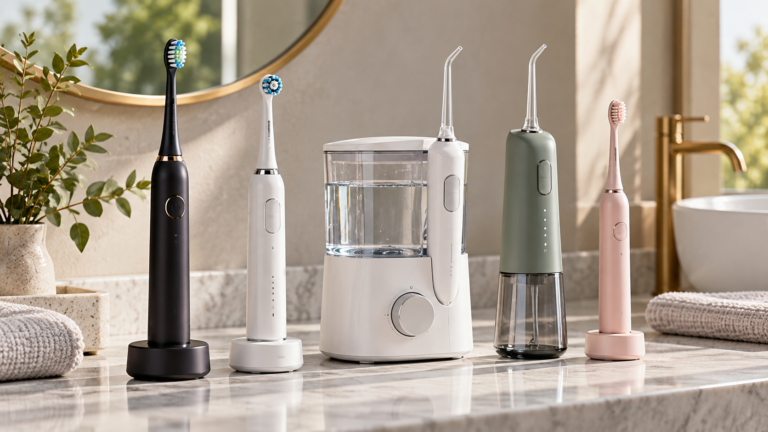
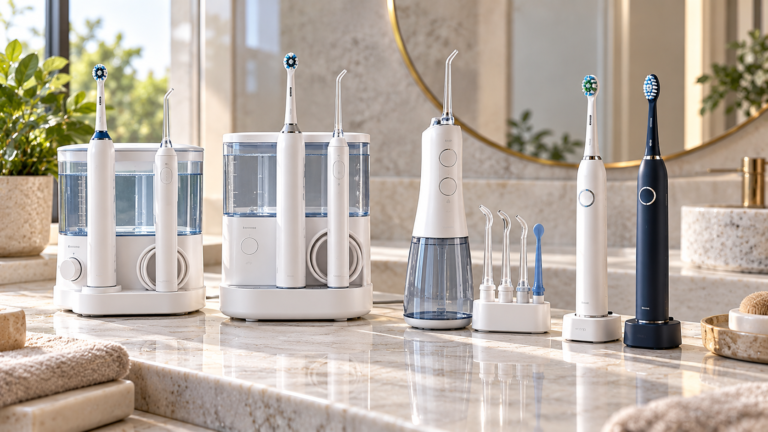
Whether you use a countertop water flosser, a cordless oral irrigator or a combined electric toothbrush and water-flossing system, regular maintenance is an important part of keeping the device in good working condition.
However, cleaning a water flosser involves more than occasionally rinsing its water tank.
Over time, residual moisture, mineral deposits and other buildup can affect the reservoir, nozzle, water pathways and connection points.
Some devices also have removable valves, hoses and specialized tips that require separate attention.
The most practical maintenance routine combines emptying the reservoir after use, cleaning removable components regularly, allowing appropriate drying and following the manufacturer’s instructions for internal cleaning.
A common mistake is assuming that every water flosser can be cleaned with the same vinegar solution or placed in a dishwasher.
In reality, cleaning instructions vary by brand, model and component.
This guide explains how to clean water flosser reservoirs, maintain nozzles, identify mineral buildup, reduce storage problems and recognize when replacement parts may be necessary.
1. Why Does a Water Flosser Need Cleaning?
A water flosser contains components that repeatedly come into contact with water.
Depending on the design, these may include:
- Water reservoir.
- Reservoir cap or filling port.
- Water inlet valve.
- Internal tubing.
- Pump assembly.
- Handle.
- Removable nozzle.
- Nozzle connection.
- Charging-port cover.
These components have different cleaning requirements.
Mineral deposits
Tap water contains dissolved minerals.
In areas with relatively hard water, minerals can gradually accumulate inside appliances that regularly handle water.
Waterpik explains that mineral deposits and other materials can collect inside water flossers and reduce water pressure or overall performance.
Residual moisture
Water remaining inside the reservoir or around removable components can create persistently damp conditions.
Proper emptying and drying help keep accessible areas cleaner between uses.
Toothpaste and oral-care residue
Water flosser nozzles and handles may come into contact with saliva, toothpaste residue or oral-care products during normal use.
These residues should be cleaned according to the manufacturer’s instructions.
General household dust
A water flosser stored on an open bathroom countertop may accumulate dust or splashes on its exterior.
Regular wiping helps maintain the device’s external condition.
Cleaning reduces unwanted buildup, but ordinary home cleaning does not guarantee that a device is sterile.
2. Understand the Parts That Need Maintenance
Different water flosser components require different care.
| Component | Common maintenance task | Main consideration |
|---|---|---|
| Reservoir | Empty, rinse and wash | Residue and standing water |
| Reservoir lid | Clean and dry | Moisture around edges |
| Inlet valve | Inspect and clean if removable | Deposits and water flow |
| Nozzle or tip | Rinse and inspect | Blockage, damage and wear |
| Handle | Wipe or clean as directed | Residue and connection condition |
| Internal tubing | Manufacturer-approved flushing | Mineral buildup |
| Exterior housing | Wipe with suitable cloth | Dust and splashes |
| Charging port | Keep clean and dry | Electrical safety |
| Base and controls | Wipe without unnecessary soaking | Moisture exposure |
Not every model contains all these parts.
For example, a countertop unit may have a separate reservoir, hose and handheld nozzle.
A cordless model may integrate the reservoir and pump into one portable device.
A combined brushing-and-flossing system may introduce additional accessories and cleaning instructions.
The exact design determines which components can be safely removed.
3. Daily Water Flosser Cleaning: What to Do After Every Use
The most useful habit is to avoid leaving unnecessary water sitting in the reservoir.
A simple after-use routine does not need to be complicated.
Step 1: Switch off the device
Finish the flossing session and turn off the unit.
For countertop models, follow the manufacturer’s electrical safety instructions when cleaning.
Step 2: Empty remaining water
Discard unused water from the reservoir.
Avoid leaving water inside for long periods simply because you plan to use the device again the following day.
Step 3: Rinse the reservoir when appropriate
If the manufacturer’s instructions permit it, rinse the reservoir with clean water.
Pay attention to any visible residue around the filling area.
Step 4: Rinse the nozzle
Remove the nozzle if appropriate and rinse it according to the device instructions.
Avoid touching or damaging delicate bristles on specialized tips.
Step 5: Allow accessible parts to dry
Position the reservoir and removable components according to the manufacturer’s storage guidance so that they can drain or air-dry.
Do not automatically seal damp components inside an airtight container.
Step 6: Store securely
Keep the device upright or in its recommended storage position.
Avoid locations where it may fall, become excessively wet or contact contaminated surfaces.
Daily maintenance checklist
- Switch off the device.
- Empty unused reservoir water.
- Rinse the nozzle as directed.
- Inspect for obvious residue or leakage.
- Allow appropriate drainage and drying.
- Store the unit safely.
This is a practical general routine. Any model-specific instructions take priority.
4. How to Clean a Water Flosser Reservoir
The reservoir is one of the most accessible parts of a water flosser.
It is also one of the easiest components to maintain regularly.
Step 1: Remove the reservoir
Detach the reservoir using the manufacturer’s specified procedure.
Do not force it if you are unfamiliar with the attachment mechanism.
Certain cordless reservoirs use a twisting or sliding connection.
Countertop models may lift directly away from their base.
Step 2: Empty the water
Pour out any remaining water.
Step 3: Inspect the interior
Look for:
- Visible residue.
- Mineral deposits.
- Discoloration.
- Debris around the filling opening.
- Buildup near the outlet valve.
Step 4: Wash with an approved cleaning method
For many models, manufacturers permit hand washing the reservoir with warm water and mild soap.
Use a soft cloth or a suitable small cleaning brush if allowed.
Avoid harsh abrasive tools that may scratch the interior.
Step 5: Rinse thoroughly
Remove soap residue using clean water.
Step 6: Allow the reservoir to dry
Place it where water can drain and air can circulate.
Step 7: Reassemble
Reattach the reservoir only when appropriate for the model and storage method.
Check any valve or seal for correct placement.
Important
Do not assume that every reservoir is removable or dishwasher-safe.
Some devices have integrated tanks that require a different procedure.
Refer to the model’s instructions before trying to dismantle any component.
5. Can You Put a Water Flosser Reservoir in the Dishwasher?
Sometimes.
Waterpik states that reservoirs on many of its supported models can be cleaned on the top rack of a dishwasher.
It recommends air-drying rather than using a heated drying cycle.
Philips also permits top-rack dishwasher cleaning for reservoirs on various Sonicare Power Flosser models.
However, these instructions do not apply universally.
Why dishwasher compatibility varies
Different reservoirs may use:
- Distinct plastics.
- Rubber seals.
- Removable valves.
- Integrated electronic components.
- Specialized coatings or attachment mechanisms.
Heat and mechanical washing can affect materials that are not designed for dishwasher use.
Before placing a reservoir in the dishwasher
Confirm:
- The manufacturer permits dishwasher cleaning.
- The reservoir is removable.
- Any valve must be removed or retained as directed.
- The recommended rack position.
- Whether heated drying is permitted.
- Whether other components need separate cleaning.
Never place a powered handle, charging base or electrical housing in a dishwasher unless the manufacturer specifically identifies that component as dishwasher-safe.
6. How to Clean a Water Flosser Nozzle
The nozzle directs water toward the teeth and gumline.
It should be kept clean and inspected for damage.
Basic cleaning
For many models:
- Turn off the device.
- Release the nozzle using the designated mechanism.
- Rinse the nozzle under suitable running water.
- Inspect its opening.
- Remove visible residue according to the instructions.
- Allow it to dry appropriately.
- Reinstall it securely before the next use.
Avoid forcing metal objects, pins or needles into the nozzle opening.
Improvised tools can damage the internal passage or alter the water stream.
Waterpik nozzle cleaning
Waterpik’s official guidance for supported tips describes removing the tip and soaking it in an approved solution of white vinegar or hydrogen peroxide, followed by rinsing.
Its current tip guidance provides a soaking period of approximately five to seven minutes for applicable tips.
However, this must not be applied indiscriminately to every water flosser nozzle.
Philips Sonicare Power Flosser nozzle cleaning
Philips recommends rinsing removable nozzles under warm water.
For certain models, it also recommends soaking clogged nozzles in a mixture of two parts water and one part white vinegar for five minutes, followed by rinsing.
Why the exact model matters
Different nozzles may contain:
- Rubber components.
- Small bristles.
- Specialized spray openings.
- Narrow internal channels.
- Different plastics.
Use the cleaning method approved for the actual nozzle.
7. How Often Should Water Flosser Tips Be Replaced?
Replacement frequency varies by manufacturer and tip type.
Waterpik currently provides different intervals for different accessories.
Examples from Waterpik’s official guidance
| Waterpik tip type | Manufacturer’s suggested replacement |
|---|---|
| Precision or standard jet tip | Every 6 months |
| Tongue-cleaning tip | Every 6 months |
| Orthodontic tip | Every 3 months |
| Plaque Seeker tip | Every 3 months |
| Pik Pocket tip | Every 3 months |
| Toothbrush tip | Every 3 months |
These intervals apply to the specified Waterpik products.
Other manufacturers may recommend different replacement schedules.
Why do some tips need earlier replacement?
Bristled tips can experience mechanical wear.
Their bristles may bend or spread during use.
Other tips can gradually develop deposits that affect water delivery.
Replace a tip earlier if:
- The nozzle is cracked.
- The attachment is damaged.
- The tip leaks unexpectedly.
- Bristles are visibly worn.
- The opening remains obstructed despite approved cleaning.
- The manufacturer identifies another replacement condition.
Do not continue using a damaged accessory merely because it has not reached its usual replacement date.
8. What Causes White Deposits Inside a Water Flosser?
White deposits may be associated with minerals present in water.
Hard water commonly contains dissolved calcium and magnesium.
When water repeatedly contacts surfaces, mineral deposits may accumulate.
These deposits are often described as limescale.
Where deposits may appear
- Reservoir walls.
- Water outlet.
- Nozzle opening.
- Reservoir valve.
- Accessible water channels.
- Internal tubing.
Possible signs of mineral buildup
You may notice:
- Visible whitish residue.
- Reduced water flow.
- Uneven water delivery.
- Changes in spray consistency.
- Reduced pressure.
- Repeated nozzle blockage.
However, reduced pressure can also result from other causes, including a poorly seated reservoir, damaged pump or incorrectly installed tip.
Do not assume every performance problem is caused by hard-water deposits.
9. Can White Vinegar Be Used to Clean a Water Flosser?
Yes, when the specific manufacturer and model permit it.
White vinegar is commonly recommended by Waterpik and Philips for removing mineral deposits in supported products.
However, the instructions differ.
Waterpik’s guidance
Waterpik’s updated general cleaning guide recommends a vinegar-and-water procedure for compatible products.
Its published directions describe:
- Cleaning appropriate external components.
- Washing the reservoir.
- Running a specified vinegar-water mixture through the internal water path.
- Following the treatment with clean water.
Waterpik’s guide recommends completing this cleaning process monthly for the models covered by that guidance.
Philips’ guidance
Philips provides its own cleaning instructions for Sonicare Power Flosser products.
For various models, it recommends:
- Weekly overall cleaning.
- Regular nozzle rinsing.
- Approved vinegar treatment for certain blocked nozzles.
- Specific vinegar quantities for internal cleaning.
- Flushing with clean water afterward.
Why you should not copy a random vinegar recipe
The correct procedure may vary in:
- Vinegar concentration.
- Water temperature.
- Solution quantity.
- Contact time.
- Whether the pump should run continuously.
- Whether the unit should rest during cleaning.
- Required rinsing.
- Component compatibility.
Using an unapproved concentration could damage materials or leave unwanted residue.
Do not mix vinegar with bleach or other household cleaning chemicals.
Use only the cleaning products and procedures permitted in the manufacturer’s manual.
10. How to Flush Internal Water Flosser Components
Internal flushing helps address buildup in the water pathway.
However, the procedure must be compatible with the device.
General concept
A manufacturer-approved solution may be placed in the reservoir and circulated through the internal water system.
This can help remove certain mineral deposits.
The system is then flushed with clean water.
Before beginning
Confirm:
- The device supports internal cleaning with the proposed solution.
- The specified solution concentration.
- The appropriate water temperature.
- The recommended pressure or operating setting.
- Any required resting period.
- The correct rinse procedure.
Example: Waterpik
Waterpik describes internal cleaning using a diluted vinegar solution followed by a clean-water rinse.
Its instructions vary between some product manuals and its more recent general maintenance guide.
Follow the guidance applicable to your exact model.
Example: Philips
For supported Sonicare Power Flosser models, Philips describes using warm water and a specified amount of white vinegar, running the solution through the device, and flushing the system afterward with clean warm water.
What not to do
Do not:
- Pump undiluted cleaning chemicals through the device without approval.
- Add dishwasher detergent to the water system.
- Use boiling water.
- Mix household chemicals.
- Dismantle the pump.
- Force a blocked component.
- Attempt internal cleaning while a cordless unit is connected to its charging cable.
If performance remains abnormal after approved cleaning, consult the manufacturer.
11. How Often Should You Deep-Clean a Water Flosser?
There is no single maintenance interval appropriate for every water flosser.
Waterpik’s general guide recommends monthly cleaning.
Philips recommends weekly cleaning of its Power Flosser devices, with additional instructions for particular internal components.
Some older Waterpik product manuals specify internal descaling approximately every one to three months.
Why recommendations differ
Factors include:
- Device design.
- Water quality.
- Manufacturer instructions.
- Frequency of use.
- Reservoir construction.
- Nozzle type.
- Mineral accumulation.
Practical maintenance schedule
| Frequency | Practical task |
|---|---|
| After each use | Empty leftover water and rinse components as directed |
| Regularly | Inspect nozzle, reservoir and connection areas |
| Weekly | Wash accessible components where appropriate |
| Monthly | Perform model-approved deeper cleaning if specified |
| Every 3–6 months | Review tip replacement instructions |
| Whenever performance changes | Inspect for blockage, leaks or damage |
This is an organizational checklist, not a replacement for the manufacturer’s schedule.
12. Why Drying Is Important
Water flossers are designed to handle water, but that does not mean every part should remain wet between uses.
Accessible reservoirs, tips and caps can benefit from appropriate draining and drying.
What happens when water remains inside?
Standing water can create conditions in which microorganisms may persist or multiply, depending on the circumstances.
However, the risk varies with water quality, device condition and storage practices.
It would be inaccurate to claim that leaving water overnight automatically creates dangerous bacterial contamination.
The practical objective is to reduce unnecessary standing water and visible residue.
Recommended drying habits
- Empty unused water.
- Allow removable parts to drain.
- Air-dry the reservoir as directed.
- Keep the exterior clean.
- Avoid sealing wet components inside storage cases.
- Protect charging connections from moisture.
What about internal tubing?
Not every water flosser can be completely emptied of internal moisture through normal user maintenance.
Do not attempt to disassemble the device to dry internal tubes.
Follow its specific draining and storage procedure.
Dry accessible components appropriately without attempting to remove parts that the manufacturer does not designate as user-serviceable.
13. Countertop vs Cordless Water Flosser Cleaning
These formats differ in construction and maintenance.
Countertop water flossers
A countertop unit often includes:
- Larger removable reservoir.
- Pump base.
- Flexible hose.
- Separate handle.
- Removable nozzle.
The reservoir may be convenient to wash independently.
However, the hose and handle require model-specific care.
Cordless water flossers
A cordless unit integrates the pump, reservoir and handle into a smaller housing.
This can improve portability but may make certain components less accessible.
Cordless models also include charging systems that require electrical precautions.
Comparison
| Cleaning factor | Countertop flosser | Cordless flosser |
|---|---|---|
| Reservoir | Often detachable | May twist off, slide off or be integrated |
| Handle | Usually separate | Integrated into main housing |
| Hose | Often external | Usually internal |
| Charging system | Usually mains-powered base | Rechargeable battery on many models |
| Deep cleaning | Model-specific | Model-specific |
| Drying | Reservoir and accessories | Reservoir, nozzle and approved openings |
| Storage | Requires counter space | Often easier to pack |
Neither type is automatically easier to maintain in every situation.
Before purchasing, review whether the reservoir and nozzle can be removed for cleaning.
14. How to Maintain a Water Flosser and Electric Toothbrush Combo
Some oral-care systems combine an electric toothbrush and water flosser in one setup.
There are two common arrangements.
Separate-device combo kits
These include a separate toothbrush and water flosser sold together.
Each device has its own maintenance requirements.
Integrated brushing-and-flossing systems
These combine brushing and water flossing functions in one device or coordinated system.
The cleaning process may involve additional water channels, brush heads or specialized components.
What should you check?
Identify which parts belong to the water-flossing system and which belong to the toothbrush.
For example:
- Water-flosser reservoir: clean according to water-flosser instructions.
- Water-flosser nozzle: rinse and replace as directed.
- Electric brush head: rinse and replace according to toothbrush guidance.
- Charging base: wipe only as permitted.
- Shared housing: follow the integrated-system manual.
Do not assume that a toothbrush head can be soaked in the same solution used for water-flosser descaling.
An integrated design does not mean all components tolerate identical cleaning methods.
15. Can You Put Mouthwash in a Water Flosser?
Some manufacturers permit certain mouthwashes or therapeutic rinses in selected devices.
However, not every water flosser is intended to handle every liquid.
Why liquid compatibility matters
Mouthwash formulations can contain different ingredients.
Depending on the product, these may include:
- Alcohol.
- Flavoring agents.
- Colorants.
- Antimicrobial ingredients.
- Other dissolved substances.
Certain liquids may require additional rinsing after use.
Waterpik guidance
Waterpik permits mouthwash and selected solutions in certain models.
Its manuals instruct users to flush the system with clean warm water after using special solutions to help prevent clogging.
Before using mouthwash
Check:
- Whether the manufacturer permits it.
- Whether dilution is required.
- Whether the specific mouthwash is suitable.
- Whether the system must be flushed afterward.
- Whether a dentist has recommended a particular therapeutic rinse.
What about saltwater?
Do not assume saltwater is permitted.
Saline solutions may leave deposits or interact with components differently.
Use only liquids approved for the exact product.
Avoid improvised mixtures
Do not add essential oils, concentrated disinfectants or home-prepared cleaning mixtures to the reservoir for oral use unless explicitly directed by an appropriate professional and permitted by the device manufacturer.
16. Can Family Members Share One Water Flosser?
Some water flossers are designed for multiple users.
Waterpik states that several of its devices can be shared using separate removable tips.
Its replacement tips may have colored rings for identification.
Better household practices
Each person should have their own compatible tip.
Store tips so they remain identifiable.
Avoid unnecessary contact between used tips.
Clean the device’s shared components according to the manufacturer’s instructions.
Replace each person’s tip when appropriate.
What should not be shared?
Do not share the same used nozzle between family members.
A water flosser tip comes into contact with the oral environment and should remain assigned to its intended user.
Can every device be shared?
No universal rule applies.
Some manufacturers may restrict certain devices to individual use.
Follow the instructions for the specific model.
17. How to Recognize a Clogged Water Flosser Nozzle
A blocked nozzle may produce several symptoms.
Common signs
- Weak water stream.
- Uneven spray.
- Water leaving at an unusual angle.
- Intermittent flow.
- Visible residue at the outlet.
- Abnormal spray behavior.
However, these symptoms do not always mean that the nozzle itself is blocked.
They can also occur because of reservoir positioning, pump problems or air entering the system.
What to do first
Turn off the device.
Remove the nozzle as directed.
Inspect it for visible damage or blockage.
Clean it using the manufacturer’s approved method.
Reinstall it securely.
If the problem persists, consult the troubleshooting instructions for the model.
Should you use a needle to clear the opening?
Not unless the manufacturer specifically instructs you to do so.
A sharp object can damage the nozzle or enlarge the opening.
This may alter water flow.
Replacement can be safer than attempting an improvised repair.
18. Why Is My Water Flosser Losing Pressure?
Reduced water pressure is a common maintenance concern.
Possible causes include:
- Mineral deposits.
- Partially blocked nozzle.
- Reservoir not fully seated.
- Air trapped in the water path.
- Incorrect pressure setting.
- Pump malfunction.
- Damaged tubing.
- An obstructed valve.
Troubleshooting checklist
| Symptom | Possible issue | Appropriate first step |
|---|---|---|
| Weak stream | Mineral buildup or obstruction | Follow approved cleaning instructions |
| No water | Empty or incorrectly seated reservoir | Check filling and positioning |
| Intermittent flow | Air or water supply interruption | Follow priming guidance |
| Leakage near nozzle | Loose or damaged tip | Check installation and condition |
| Leakage near reservoir | Valve or seal problem | Inspect approved removable parts |
| Unusual noise | Air, deposits or mechanical problem | Stop and consult troubleshooting guide |
| Persistent poor performance | Internal fault | Contact authorized support |
Waterpik provides product-specific guidance for low-pressure problems and recommends cleaning relevant components.
Do not automatically increase pressure to maximum in an attempt to compensate for a blocked nozzle.
If the device behaves abnormally, stop using it until the problem is understood.
19. Water Flosser Electrical Safety During Cleaning
Water flossers combine water-handling components with electrical power or rechargeable batteries.
This makes electrical safety particularly important.
For countertop units
Unplug the unit before cleaning when required.
Do not immerse the powered base in water unless explicitly permitted.
Use approved cleaning methods for the exterior.
Keep electrical connections appropriately protected.
For cordless units
Disconnect the charging cable before cleaning.
Philips specifically instructs users not to clean its cordless Power Flosser while the charging cable and adapter remain connected.
It also directs users to close the charging-port cover before cleaning.
Never ignore damage
Stop using a device if you notice:
- Damaged charging cable.
- Cracked electrical housing.
- Water entering an area not designed for water exposure.
- Burning smell.
- Unusual heating.
- Electrical malfunction.
Do not attempt internal electrical repairs yourself.
Contact the manufacturer or an authorized service provider.
20. How to Store a Water Flosser While Traveling
Travel creates different maintenance challenges.
A cordless water flosser may be placed inside a closed pouch for several days.
Moisture left inside the reservoir can make storage less hygienic.
Before packing
Empty unused water.
Follow the manufacturer’s draining instructions.
Clean the reservoir and nozzle when appropriate.
Allow accessible components to dry.
Protect the nozzle from bending or damage.
During travel
Keep the device in an appropriate case.
Avoid storing it loose among sharp objects.
Protect the charging connection.
Check airline restrictions for battery-powered devices when relevant.
After travel
Inspect the reservoir, nozzle and charging area.
If the unit has been stored for an extended period, follow its recommended cleaning and flushing procedure before use.
Do not assume that a stored flosser is ready for immediate use without checking its condition.
21. Does a Water Flosser Replace Toothbrushing?
No.
A water flosser and a toothbrush serve complementary oral-care purposes.
A toothbrush cleans accessible tooth surfaces using bristles and toothpaste.
A water flosser directs water between teeth and around the gumline.
The American Dental Association recommends brushing twice daily and cleaning between teeth once daily using a suitable interdental cleaning method.
Water flossers are one category of interdental cleaning device.
Do you still need dental floss?
The most suitable method depends on your oral anatomy, dental work and preferences.
Some people may benefit from traditional floss, interdental brushes or a water flosser.
The ADA notes that different interdental cleaners suit different circumstances.
A dental professional can recommend a suitable combination.
Why maintenance matters
Keeping the device clean supports reliable operation, but does not replace correct flossing technique.
A properly cleaned water flosser should still be used at an appropriate pressure and in accordance with its instructions.
22. Common Water Flosser Cleaning Mistakes
Mistake 1: Leaving water in the tank for long periods
Empty remaining water and follow appropriate drying instructions.
Mistake 2: Assuming every reservoir is dishwasher-safe
Check the exact product manual first.
Mistake 3: Using concentrated vinegar without approval
Follow the manufacturer’s specified dilution and procedure.
Mistake 4: Mixing cleaning chemicals
Never combine vinegar with bleach or other incompatible cleaning chemicals.
Mistake 5: Forgetting to rinse after descaling
Run the manufacturer’s prescribed clean-water rinse before oral use.
Mistake 6: Cleaning only the reservoir
The nozzle, connections and other components may also require maintenance.
Mistake 7: Using a damaged tip
Replace cracked, worn or unstable accessories.
Mistake 8: Ignoring reduced water pressure
Investigate possible blockage or mechanical problems.
Mistake 9: Immersing the powered base in water
Only immerse components specifically approved for immersion.
Mistake 10: Storing the unit wet in a sealed travel case
Allow accessible components to dry appropriately before long-term storage.
Mistake 11: Assuming every tip has the same replacement interval
Bristled and non-bristled tips may have different manufacturer recommendations.
Mistake 12: Using improvised tools to clear the nozzle
Sharp objects can damage nozzle openings.
23. A Simple Water Flosser Maintenance Calendar
A practical calendar can make maintenance easier without requiring complicated tracking.
| Schedule | Task | What to check |
|---|---|---|
| Every use | Empty remaining water | Reservoir is not left unnecessarily full |
| Every use | Rinse nozzle as directed | No visible debris |
| Every use | Allow drying | Appropriate airflow and drainage |
| Weekly | Wash reservoir where permitted | No visible residue |
| Weekly | Wipe exterior and accessible connections | Cleanliness and component condition |
| Monthly | Perform approved deeper cleaning | Deposits and water flow |
| Every 3 months | Check bristled-tip replacement needs | Manufacturer-specific |
| Every 6 months | Check standard-tip replacement needs | Manufacturer-specific |
| Before travel | Empty, clean and dry | No standing water |
| After prolonged storage | Inspect and follow restart procedure | Flow, leaks and component condition |
This table is an organizational example.
Philips, Waterpik and other manufacturers may specify different intervals for particular products.
Always prioritize the instructions supplied with your device.
24. How to Choose a Water Flosser That Is Easy to Clean
Maintenance requirements should be considered before buying, not only after a problem occurs.
Removable reservoir
A reservoir that can be detached may be easier to wash and inspect.
Accessible filling opening
A wide filling opening can make regular cleaning more convenient.
Replaceable nozzles
Check whether compatible replacement tips are readily available.
Clear cleaning instructions
A manufacturer that provides detailed maintenance guidance can make ownership easier.
Dishwasher compatibility
This may be convenient, but only if the exact reservoir is approved for dishwasher use.
Servicing and spare parts
Check whether replacement valves, nozzles, hoses or other supported accessories are available.
Reliable after-sales support
Customer service can be useful if mineral buildup, leakage or mechanical problems occur.
Buying checklist
| Question | Why it matters |
|---|---|
| Is the reservoir removable? | Easier access for cleaning |
| Can it be hand washed? | Routine maintenance |
| Is it dishwasher-safe? | Convenience, where approved |
| Are replacement tips available? | Long-term usability |
| Are specialized tips compatible? | Intended oral-care needs |
| Is internal flushing explained? | Mineral-deposit maintenance |
| Is the charging area protected? | Electrical safety |
| Can it dry between uses? | Better storage practicality |
| Are spare components available in India? | Ongoing ownership convenience |
A water flosser with a large feature list is not necessarily easier to maintain than a simpler model.
25. Frequently Asked Questions
How often should I clean my water flosser?
Empty remaining water after use and follow regular cleaning instructions. Waterpik’s general guide recommends monthly cleaning, while Philips recommends weekly cleaning for its Power Flosser range. Follow the exact model instructions.
Can I clean my water flosser with white vinegar?
Yes, if the manufacturer permits it. Use the specified dilution and rinse procedure rather than an improvised mixture.
Can I use undiluted vinegar in my water flosser?
Do not use undiluted vinegar unless the manufacturer specifically permits it. Many instructions require a diluted solution.
Can I put my water flosser reservoir in the dishwasher?
Some Waterpik and Philips reservoirs are dishwasher-safe. Others may not be. Confirm the exact model and component instructions.
Should I empty the reservoir after every use?
Emptying unused water is a practical maintenance habit. Follow the manufacturer’s recommendations for drainage and storage.
Do water flosser nozzles need cleaning?
Yes. Nozzles can accumulate residue or mineral deposits and should be rinsed and maintained according to the manufacturer’s instructions.
How often should Waterpik tips be replaced?
Waterpik generally recommends six months for certain non-bristled tips and three months for several bristled or specialized tips. Verify the instructions for your exact tip.
Why is my water flosser losing pressure?
Possible causes include mineral deposits, a blocked nozzle, trapped air, incorrect reservoir positioning or mechanical problems.
Can hard water damage a water flosser?
Mineral-rich water can contribute to deposits that reduce performance. Manufacturer-approved descaling can help manage buildup.
Is filtered water better for a water flosser?
Filtered water may contain different amounts of dissolved minerals depending on the filtration system. It is not automatically sterile or suitable for every device. Follow the manufacturer’s water-quality instructions.
Can I use mouthwash in my water flosser?
Some models permit selected mouthwashes, often with additional flushing instructions. Check the exact device manual.
Can I put saltwater in a water flosser?
Not unless it is permitted by the manufacturer and appropriate for your intended use. Do not assume every device tolerates saline solutions.
Can I share a water flosser with my family?
Some devices are designed for multiple users with separate tips. Check the manufacturer’s instructions and do not share used nozzles.
Is it safe to soak the water flosser handle?
Only if the manufacturer specifically permits that cleaning method for the particular handle. Do not immerse electrical housings or charging components indiscriminately.
Why does my water flosser smell unusual?
Possible explanations include residual moisture, residue or material deterioration. Stop use if the smell is abnormal, inspect and clean the device according to its instructions, and contact support if it persists.
How do I clean a clogged nozzle?
Use the manufacturer’s approved rinsing or soaking method. Avoid using needles or sharp improvised tools.
Can I use bleach to disinfect a water flosser?
Do not use bleach unless the manufacturer explicitly approves it for the exact device and procedure. Never mix bleach with vinegar or other cleaning products.
Should I dry my water flosser before packing it?
Yes. Empty and clean it as directed, and allow accessible parts to dry before extended storage.
Can I clean the pump myself?
Internal pump components should not be dismantled unless the manufacturer provides a user-serviceable procedure. Use approved internal flushing methods or authorized service support.
Does a water flosser replace brushing?
No. Water flossing is an interdental cleaning method and does not replace brushing twice daily with fluoride toothpaste.
26. Final Takeaway
Water flosser maintenance is straightforward when you separate everyday cleaning from occasional deeper maintenance.
The most useful routine is to empty the reservoir after use, rinse the nozzle, allow appropriate drying and follow the manufacturer’s instructions for washing and descaling.
Different parts require different handling.
A removable reservoir may be suitable for hand washing or dishwasher cleaning, while an electrical base requires much more caution.
Nozzle replacement intervals also vary depending on the tip’s construction.
Waterpik and Philips publish specific guidance for their products, but their cleaning procedures should not be applied automatically to unrelated brands.
Do not assume that stronger cleaning solutions produce better results.
A correctly maintained water flosser should deliver consistent water flow without requiring improvised chemicals, forced disassembly or unsafe electrical handling.
Ultimately, the best maintenance routine is one that you can follow consistently while respecting the design of your particular device.
References and Further Reading
- Waterpik — How to Clean a Water Flosser
- Waterpik — Water Flosser Tips Guide
- Waterpik — Troubleshooting Low Water Pressure
- Waterpik — Product Support and Frequently Asked Questions
- Philips Sonicare — How to Clean a Power Flosser
- American Dental Association — Dental Floss and Interdental Cleaners
Editorial note: This article provides general oral-care and equipment-maintenance information. The cleaning instructions of the manufacturer and the exact device manual take priority over general examples. Cleaning does not guarantee sterilization. Product references are illustrative and do not represent independent hands-on testing. Persistent gum bleeding, swelling or pain should be assessed by a qualified dentist. Physical Glow may earn a commission from qualifying affiliate purchases at no additional cost to readers.