How to Choose a Shaker Bottle for Your Routine
A shaker bottle looks simple, but the difference between a good one and a frustrating one usually appears after repeated use.
A poorly designed shaker can:
- leak inside a gym bag;
- leave powder clumped at the bottom;
- trap odours;
- become difficult to clean;
- retain moisture around the lid;
- spill when opened;
- feel awkward to carry.
A good shaker bottle should make mixing:
- protein powder;
- meal-replacement powder;
- electrolyte mixes;
- powdered supplements;
quick and convenient.
The practical way to choose one is:
decide what you will mix → choose the right capacity → evaluate the mixing mechanism → prioritize a reliable leak-resistant lid → check cleaning access and material → then consider storage compartments and extra features
The best shaker bottle is not necessarily:
- the largest;
- the most complicated;
- the one with the most compartments.
For most people, a simple bottle that:
mixes well → seals securely → cleans easily → fits comfortably into a gym routine
is the better choice.
What Is a Shaker Bottle?
A shaker bottle is a reusable container designed to mix liquid with powdered ingredients.
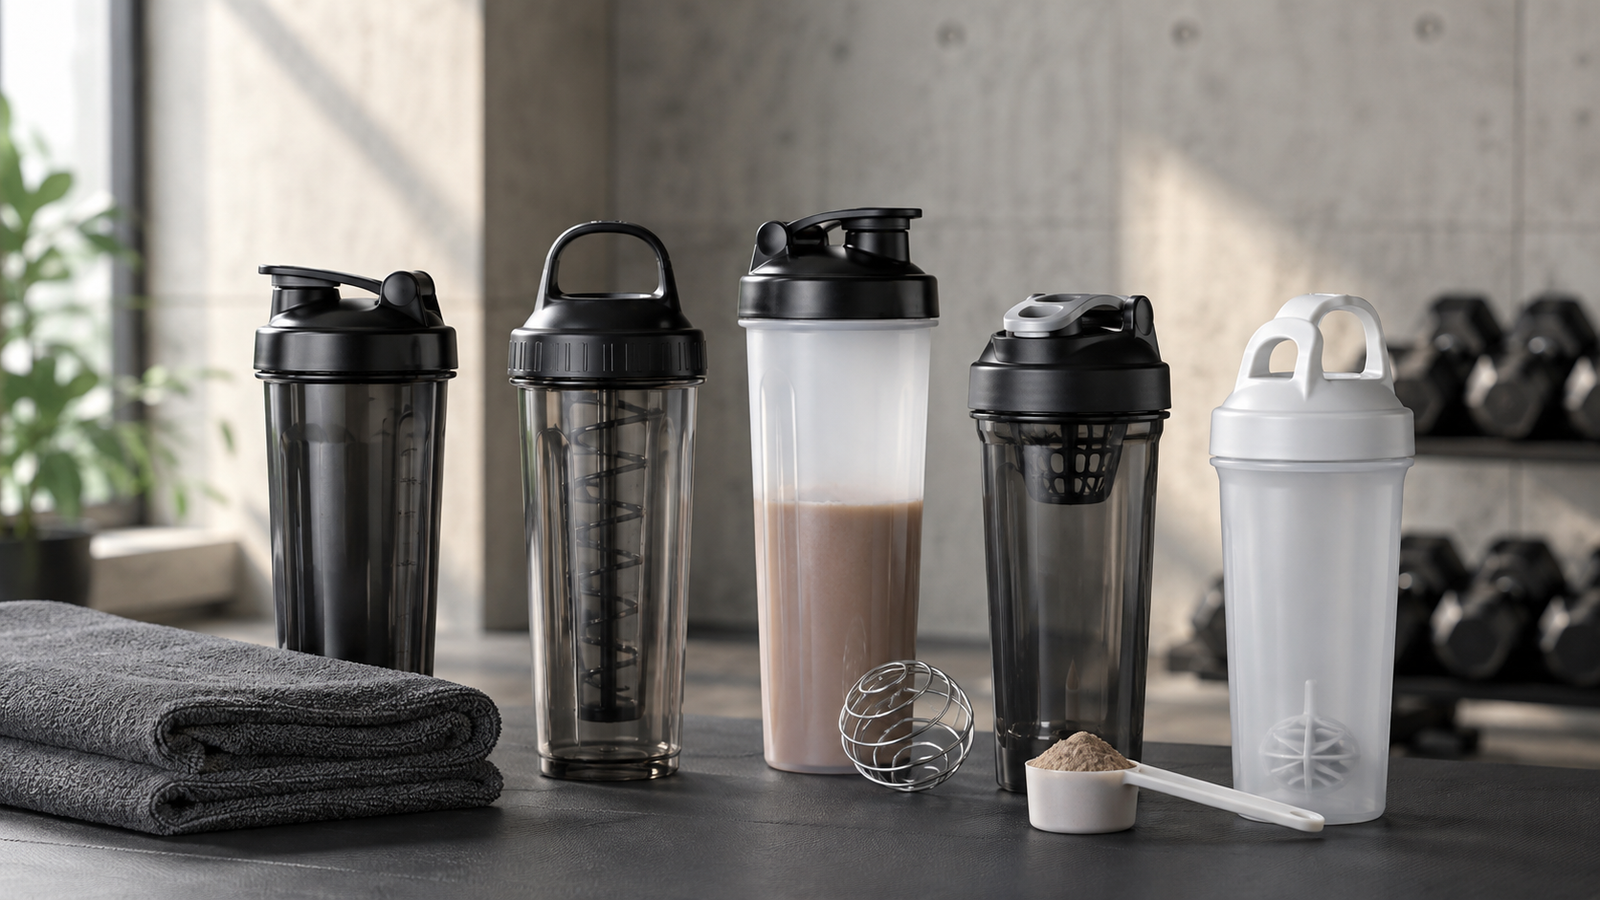
Unlike an ordinary water bottle, it usually includes a mixing mechanism such as:
- wire whisk ball;
- plastic mixing grid;
- fixed internal agitator;
- motorized blending system.
The goal is to break apart powder and distribute it more evenly through the liquid.
Common uses include:
- protein shakes;
- powdered electrolytes;
- pre-workout mixes;
- meal replacements;
- powdered carbohydrate drinks;
- other supplement powders.
Do You Actually Need a Shaker Bottle?
Not necessarily.
If you rarely use powdered products, an ordinary bottle may be enough.
You can also mix powders using:
- spoon;
- blender;
- glass;
- jar with secure lid.
A shaker becomes useful when you want:
- portability;
- faster mixing;
- fewer utensils;
- convenient gym use.
It is especially practical if you regularly prepare drinks:
- before training;
- after training;
- at work;
- while travelling.
Start With What You Plan to Mix
Different powders behave differently.
Some dissolve almost instantly.
Others are:
- thick;
- clumpy;
- difficult to mix.
Your normal drink determines how sophisticated the shaker needs to be.
Protein Powder
This is the most common use.
Most whey-based powders mix reasonably well in a standard shaker with:
- whisk ball;
- grid insert.
Thicker formulations may require:
- more vigorous shaking;
- additional liquid.
Plant-Based Protein Powder
Plant proteins can sometimes create a:
- thicker;
- grainier;
texture.
A good mixing mechanism and sufficient bottle capacity may help.
Avoid using a bottle so small that there is almost no empty space for the liquid to move while shaking.
Meal-Replacement Powders
These may contain:
- protein;
- fibre;
- carbohydrates;
- fats;
- micronutrients.
They can produce much thicker drinks than ordinary protein powder.
A larger bottle with:
- strong mixing system;
may be more practical.
Electrolyte Powders
These are usually easier to dissolve.
For electrolyte mixes, you may not need a specialized heavy-duty shaker at all.
A simple leak-resistant bottle may be enough.
Pre-Workout Powder
Most pre-workout powders dissolve relatively easily.
The main priorities may be:
- secure lid;
- easy carrying;
- suitable capacity.
You generally do not need a large shaker for this use.
Creatine
Creatine monohydrate may not completely disappear into solution, especially in cooler liquid.
A shaker can help disperse it.
But even strong shaking may not create complete dissolution.
Some settling can occur.
That does not necessarily mean the shaker is poor.
Fibre Powders
Certain fibre supplements can:
- thicken rapidly;
- gel.
Follow product instructions carefully.
Some should be consumed soon after mixing.
Do not prepare thickening fibre drinks and leave them sitting in a sealed shaker for long periods.
Powdered Carbohydrate Drinks
These may require larger volumes of water.
A higher-capacity bottle may therefore be more useful than a compact protein shaker.
Do Not Use the Same Shaker for Everything Without Thinking
A bottle that works perfectly for:
- 250 mL protein shake;
may be too small for:
- 700 mL hydration drink.
Choose capacity according to actual use.
Shaker Bottle Capacity
Capacity is one of the first features to choose.
Common sizes may include roughly:
- 400 mL;
- 500 mL;
- 600 mL;
- 700 mL;
- 800 mL;
- 1 litre or more.
The ideal size depends on:
- drink volume;
- powder amount;
- portability.
Small Shaker Bottles
A smaller bottle may work well for:
- pre-workout;
- compact protein shakes;
- carrying in small bags.
Advantages:
- lightweight;
- easier to hold;
- easier to fit in cup holders.
Limitations:
- less room for vigorous mixing;
- not ideal for large hydration drinks.
Medium Shaker Bottles
Around the general 500–700 mL range is often the most versatile.
It usually provides enough room for:
- liquid;
- powder;
- mixing movement.
This is often the most practical choice for everyday gym use.
Large Shaker Bottles
Useful for:
- high-volume hydration;
- meal replacements;
- larger drinks.
Advantages:
- more capacity;
- greater mixing space.
Disadvantages:
- heavier when full;
- takes more bag space;
- may not fit all cup holders.
Why Empty Space Matters
A shaker should not be filled completely to the top before mixing.
The liquid needs room to:
- move;
- circulate.
That movement helps break apart powder.
If the bottle is almost completely full, mixing may be less effective.
Capacity Markings
Many bottles have measurement markings such as:
- millilitres;
- ounces.
These are useful for measuring liquid.
But the printed markings may not always be perfectly precise.
For normal shake preparation, approximate volume is usually enough.
Printed vs Embossed Measurements
Printed Markings
Easy to read initially.
But may eventually:
- fade;
- scratch.
Embossed or Molded Markings
Part of the bottle itself.
Usually more durable.
But sometimes harder to see.
Material Choices
Common shaker bottle materials include:
- plastic;
- stainless steel;
- glass.
Each has advantages and disadvantages.
Plastic Shaker Bottles
Plastic is the most common material.
Advantages:
- lightweight;
- inexpensive;
- easy to see liquid level;
- widely available.
What Type of Plastic Is Used?
Many reusable bottles use materials such as:
- polypropylene;
- Tritan-type copolyester;
- other food-contact plastics.
The specific material influences:
- clarity;
- stiffness;
- odour resistance;
- durability.
Choose products intended for:
- food;
- beverage use.
BPA-Free Labels
Many reusable bottles are marketed as:
BPA-free
This means bisphenol A was not used in certain components according to the manufacturer’s material specifications.
It does not mean:
- completely chemical-free;
- universally superior.
The more important point is to choose a bottle made from materials appropriately intended for:
- food contact.
Tritan-Type Plastic
Clear copolyester bottles are popular because they may provide:
- glass-like transparency;
- good impact resistance;
- relatively low weight.
They can be useful if you want to see:
- liquid level;
- cleanliness.
Polypropylene
Common in:
- shaker bodies;
- lids.
It may appear more:
- cloudy;
- opaque.
It is lightweight and practical.
Stainless-Steel Shaker Bottles
Stainless steel provides a more durable, opaque bottle.
Advantages may include:
- strong construction;
- reduced light exposure;
- better temperature retention in insulated models;
- less staining in some cases.
Stainless Steel and Odour
Stainless steel can resist some odours better than certain plastics.
But the:
- lid;
- seals;
can still retain smell.
Cleaning remains important.
Insulated Shaker Bottles
Double-wall stainless-steel shakers can keep drinks:
- cold for longer.
Useful if you:
- train outdoors;
- prepare drinks in advance;
- live in a hot climate.
They are generally:
- heavier;
- more expensive.
Can You See Liquid Level in Stainless Steel?
No.
This is one trade-off.
If precise liquid measurement matters, you may need to:
- measure separately;
- use internal markings where provided.
Glass Shaker Bottles
Glass offers:
- neutral taste;
- easy odour removal;
- transparency.
But it is:
- heavier;
- breakable.
Some glass shakers include silicone sleeves for:
- grip;
- impact protection.
Is Glass Practical for the Gym?
Usually less practical than:
- plastic;
- stainless steel.
A bottle can be dropped in:
- locker room;
- gym floor;
- car.
If breakage risk matters, choose another material.
Which Material Is Best?
Choose Plastic If You Want:
- low weight;
- low cost;
- visible contents.
Choose Stainless Steel If You Want:
- durability;
- better temperature retention;
- premium feel.
Choose Glass If You Prioritize:
- taste neutrality;
- easy odour removal;
and are comfortable with additional weight and breakage risk.
For most gym users:
plastic or stainless steel
will be more practical.
Mixing Mechanisms
The mixing system is the main feature that separates a shaker from an ordinary bottle.
Common designs include:
- wire whisk ball;
- plastic grid;
- fixed agitator;
- mixing disc;
- motorized blender.
Wire Whisk Ball
A stainless-steel wire ball moves through the bottle while you shake.
It helps break up:
- powder clumps.
It is simple and widely used.
Advantages of a Whisk Ball
- removable;
- inexpensive;
- easy to replace;
- effective for many protein powders.
Disadvantages of a Whisk Ball
It can:
- rattle;
- be lost;
- become trapped beneath thick powder.
Some users also dislike carrying a loose metal object inside the bottle.
Is the Wire Ball Necessary?
No.
Some bottles mix very well using:
- internal grids;
- shaped agitators.
The mechanism matters less than the total design.
Plastic Mixing Grid
A grid may sit:
- beneath the lid;
- inside the neck.
Liquid and powder pass through the openings while shaking.
Advantages of Mixing Grids
- no loose metal ball;
- stays in position;
- can provide consistent mixing.
Disadvantages
Complex grids can be harder to:
- clean.
Powder may collect in:
- corners;
- small openings.
Fixed Internal Agitators
Some bottles use permanently or semi-permanently attached:
- fins;
- mixing structures.
These reduce loose parts.
But again, evaluate cleaning access.
A feature that mixes well but traps old protein residue is not a good design.
Mixing Disc Systems
Some shakers include perforated discs or internal structures intended to:
- break up powder.
These can work effectively.
The practical question is:
Can you clean every surface easily?
Motorized Shaker Bottles
Electric shakers use a small motor to create a:
- vortex;
- stirring motion.
They may be powered by:
- rechargeable battery;
- replaceable batteries.
Advantages of Electric Shakers
- no manual shaking;
- useful for smoother mixing;
- convenient for some thicker powders.
Disadvantages
They add:
- cost;
- charging;
- electronics;
- cleaning complexity;
- possible motor failure.
For ordinary whey protein, they are usually unnecessary.
Electric Shaker vs Blender
An electric shaker is still not equivalent to a full blender.
It may mix:
- powders;
- liquids.
It generally cannot properly process:
- ice cubes;
- nuts;
- whole fruit;
- frozen ingredients;
unless specifically designed as a blender.
Do not treat every motorized shaker as a portable blender.
How Much Mixing Power Do You Need?
For most powders:
- standard manual shaker is enough.
Consider motorized mixing only if you value:
- convenience;
- smoother texture.
Do not pay for technology you do not need.
Lid Design Is Critical
A shaker can mix perfectly and still be a terrible product if the lid leaks.
The lid is one of the most important components.
Look for:
- secure threading;
- reliable drinking spout;
- robust flip cap;
- proper seal.
Screw-On Lids
Most shakers use threaded lids.
They should screw on:
- smoothly;
- evenly.
Cross-threading can cause:
- leaks.
Avoid forcing the lid.
Snap-On Lids
Some bottles use pressure-fit systems.
These can be convenient.
But threaded lids generally provide greater confidence for vigorous shaking.
Flip Caps
A flip cap covers the drinking opening.
It should close with a:
- clear;
- secure;
click or lock.
Why Flip-Cap Security Matters
A weak cap can open when:
- shaking;
- carrying inside bag.
Protein shake leaking into a gym bag can damage:
- clothes;
- electronics;
- documents.
Test cap security before trusting it in a bag.
Push-Button Lids
Some bottles use push-button mechanisms.
Convenient for drinking.
But they contain more mechanical components and may be:
- harder to clean.
For a shaker, simplicity is often valuable.
Spout Design
The drinking opening should be large enough for:
- comfortable flow.
But not so large that the drink splashes.
Thick shakes often require:
- wider openings.
Spout Cover
A covered spout protects the drinking surface from:
- gym-bag dirt;
- handling.
Useful from a hygiene perspective.
Thread Quality
Cheap bottle threads may:
- strip;
- deform;
- cross-thread easily.
A lid should tighten smoothly without requiring excessive force.
Leak Resistance
Marketing may use terms such as:
- leakproof;
- leak-resistant;
- spill-proof.
Real-world performance depends on:
- seals;
- cap;
- correct closure.
Even a good bottle can leak if:
- powder is trapped in the threads;
- gasket is misaligned;
- cap is not fully closed.
Test a New Shaker Before Putting It in Your Bag
Before the first real use:
- Fill with water.
- Close lid.
- Shake vigorously.
- Turn upside down.
- Check for drips.
This is much better than discovering a defective seal inside your gym bag.
Silicone Gaskets
Many lids use silicone seals or O-rings.
These help prevent:
- leakage.
But seals can trap:
- moisture;
- protein residue.
They need periodic cleaning.
Removable Gaskets
A gasket that can be removed makes deep cleaning easier.
But make sure it is:
- reinstalled correctly.
An incorrectly seated gasket can create leaks.
Gasket Odour
Protein residue can remain beneath the seal and create persistent smell.
If a bottle smells clean but the lid still has odour, inspect:
- gasket;
- spout;
- hinge.
Cap Hinges
Flip-cap hinges can accumulate:
- residue;
- moisture.
Choose designs where these areas can be reached with:
- brush;
- cleaning tool.
Carry Loop
Some lids include a loop for:
- carrying;
- clipping.
Useful if you frequently hold the bottle by hand.
Carabiner Compatibility
A loop may allow attachment to:
- gym bag;
- backpack.
But do not assume a small loop is rated to hold the full bottle during vigorous movement.
Use it according to the manufacturer’s design.
Bottle Shape
Shape affects:
- grip;
- cleaning;
- cup-holder fit.
Straight-Sided Bottles
Advantages:
- easy to clean;
- simple design.
Contoured Bottles
May provide better:
- hand grip.
Useful during workouts.
But deep contours can sometimes make internal cleaning slightly harder.
Wide-Mouth Bottles
Wide openings make it easier to:
- add powder;
- add ice;
- clean.
This is one of the most practical features.
Narrow-Mouth Bottles
May be easier to:
- drink from.
But pouring powder inside can become:
- messy.
For shaker use, a wider opening is generally preferable.
Adding Protein Powder Without Spilling
A wide mouth makes scooping easier.
If the bottle opening is narrow, use:
- funnel;
- paper scoop guide.
But a well-designed shaker should not require a special funnel for ordinary protein powder.
Grip Texture
Textured surfaces can improve:
- handling;
- wet grip.
Useful if your hands are sweaty.
Rubber Grip Sections
These can feel secure.
But rubberized coatings may eventually:
- peel;
- become sticky;
depending on material quality.
A molded texture may be more durable.
Cup-Holder Compatibility
If you carry the bottle in:
- car;
- exercise-bike holder;
- treadmill holder;
check diameter.
Large-volume shakers may not fit standard cup holders.
Gym Equipment Bottle Holders
Some cardio machines use relatively narrow bottle holders.
A huge 1-litre shaker may be awkward.
Measure if this matters.
Base Stability
A broad, flat base reduces tipping.
This matters when placing the bottle on:
- gym floor;
- bench;
- desk.
Rounded Bottoms
Some shakers use rounded internal bases to reduce powder collection in corners.
This can improve:
- mixing;
- cleaning.
It is a useful design feature.
Internal Corners
Sharp internal corners can trap:
- powder;
- dried shake residue.
A smoother interior is easier to clean.
Measurement Accuracy
If you use the bottle mainly to estimate liquid volume for:
- protein shakes;
printed measurements are usually sufficient.
Do not use an ordinary shaker for tasks requiring precise:
- medical;
- laboratory;
measurement.
Storage Compartments
Some shaker bottles include attachable compartments for:
- protein powder;
- supplement tablets;
- snacks.
These can be useful for travel.
Bottom Storage Containers
These screw onto the bottom of the bottle.
Advantages:
- keep powder separate until needed;
- reduce need for additional containers.
Disadvantages of Attached Storage
They make the bottle:
- taller;
- heavier;
- more complex.
They also create more:
- threads;
- surfaces;
- parts to clean.
If you rarely use them, they may be unnecessary.
Powder Storage Compartments
Useful if you want to carry powder dry and add it later.
This prevents a prepared shake from sitting for hours.
Supplement Pill Compartments
Some bottles include small organisers for:
- capsules;
- tablets.
Useful for some users.
But keep supplements stored according to:
- product instructions.
Avoid leaving heat-sensitive products in a hot gym bag or car.
Is Integrated Storage Better Than Separate Containers?
Not always.
A small separate powder container can be:
- easier to clean;
- more flexible.
Integrated systems are mainly valuable for:
- convenience.
Modular Shakers
Some bottles allow storage modules to:
- attach;
- detach.
This provides flexibility.
On days you do not need powder storage, remove it.
Protein Funnel Containers
Some accessory containers have narrow openings that act as funnels.
They can be useful for transferring powder into:
- water bottles;
- shakers.
This can be more convenient than a large integrated storage section.
Insulation
Most plastic shakers are not insulated.
If temperature matters, choose:
- insulated stainless steel.
Do Protein Shakes Need to Stay Cold?
If your shake contains perishable ingredients such as:
- milk;
- dairy;
- prepared food ingredients;
it should not be left unrefrigerated indefinitely.
Temperature safety depends on:
- ingredients;
- environment;
- time.
A shaker is not a substitute for proper food storage.
Water-Based Protein Shakes
A protein powder mixed with water may still develop:
- unpleasant odour;
- microbial growth;
if left warm for long periods.
Consume promptly and clean the bottle.
Milk-Based Shakes
These require greater attention to:
- temperature;
- storage.
Use:
- refrigeration;
- insulated bottle with appropriate cooling strategy;
when necessary.
Do not leave milk-based shakes sitting in a hot car.
Ice in a Shaker Bottle
Some bottles can accommodate:
- ice cubes.
A wide mouth helps.
Ice can help keep the drink cold temporarily.
But plastic shakers are usually not thermally insulated.
Can You Shake Carbonated Drinks?
Generally avoid vigorously shaking sealed carbonated beverages.
Pressure can build inside the bottle.
Opening may cause:
- sudden foaming;
- spray.
Use shaker bottles primarily for non-carbonated drinks unless the manufacturer explicitly says otherwise.
Hot Liquids
Be very cautious.
Many shaker bottles are not designed for:
- hot;
- pressurized liquids.
Shaking hot liquid in a sealed container can increase pressure and create:
- burns;
- sudden lid release.
Always follow manufacturer temperature limits.
Do Not Shake Boiling Water
This should be avoided.
Even if the plastic material technically tolerates heat, sealing and shaking very hot liquid can be dangerous.
Dishwasher Safety
Some shaker bottles are dishwasher safe.
Others are only partially dishwasher safe.
Check:
- bottle body;
- lid;
- mixing mechanism;
- storage compartments.
These may have different instructions.
Top Rack Only
Plastic bottles may be specified as:
- top-rack dishwasher safe.
Higher heat near the bottom heating element may:
- warp;
- damage components.
Follow the care label.
Stainless-Steel Dishwasher Safety
Some stainless bottles are dishwasher safe.
Others should be hand washed to protect:
- exterior coating;
- insulation;
- seals.
Again, follow the manufacturer’s directions.
Hand Washing
A good shaker should be easy to clean using:
- warm water;
- dish soap;
- bottle brush.
If cleaning requires 15 minutes every time, the design is unnecessarily complicated.
Why Shaker Bottles Develop Odour
Protein residue can remain in:
- threads;
- lid;
- gasket;
- whisk;
- corners.
When left warm, this residue can develop a very strong smell.
The Biggest Hygiene Rule
Do not leave an empty used protein shaker closed inside your gym bag.
If you cannot wash it immediately:
- Rinse it.
- Leave it open to air where practical.
- Wash properly as soon as possible.
A sealed dirty shaker can become extremely unpleasant within hours.
Rinse Immediately After Use
Even a quick rinse removes much of the:
- remaining protein;
- sugar;
- residue.
This makes proper cleaning later significantly easier.
Separate the Parts
When washing:
- bottle;
- lid;
- gasket;
- whisk ball;
- storage compartments;
should be cleaned individually where possible.
Clean the Lid Carefully
The lid often smells before the bottle body.
Pay attention to:
- drinking spout;
- cap hinge;
- threads;
- gasket channel.
Use a small cleaning brush if necessary.
Bottle Brushes
A long bottle brush is useful for:
- narrow;
- deep bottles.
For wide-mouth shakers, a normal dish brush may be enough.
Small Detail Brushes
These can reach:
- gasket grooves;
- drinking spouts;
- threads.
Useful for frequently used bottles.
Wire Whisk Cleaning
The whisk ball usually cleans easily in:
- dishwasher;
- soapy water.
Check material instructions.
Protein residue can accumulate if the whisk is left inside a dirty bottle.
Dry Everything Completely
After washing:
- separate the parts;
- allow them to air dry.
Do not immediately reassemble a wet bottle and seal it.
Trapped moisture can contribute to:
- odour;
- microbial growth.
Store the Bottle Open
When not in use, leave:
- lid off;
- cap open;
if practical.
This improves airflow.
Deep Cleaning for Odour
If ordinary dish soap does not remove smell, follow manufacturer-approved cleaning methods.
Possible approaches may include:
- baking-soda soak;
- bottle-cleaning tablets;
depending on material.
Do not randomly use harsh chemicals.
Baking Soda
A mild baking-soda solution can sometimes help with odour.
Rinse thoroughly afterward.
Check manufacturer guidance, particularly for:
- coated metals;
- specialized finishes.
Vinegar
Diluted vinegar is sometimes used for bottle cleaning.
Again, compatibility depends on materials.
Avoid prolonged exposure where manufacturer instructions advise against it.
Bleach
Do not automatically use bleach in a reusable shaker.
Some manufacturers may provide specific diluted sanitizing instructions, but concentrations and contact times matter.
Follow official care instructions rather than improvising.
Protein Residue Around Gaskets
If smell persists despite washing, remove the gasket and inspect beneath it.
This is a common hidden source.
Mold-Like Growth
If you see:
- visible growth;
- persistent discoloration;
- residue that cannot be removed;
stop using the bottle until it can be properly cleaned.
If porous components remain contaminated, replacement may be more practical.
Scratched Plastic
Deep scratches can:
- trap residue;
- become harder to clean.
If the inside becomes heavily scratched and difficult to clean, consider replacement.
Cloudy Plastic
Clouding may occur from:
- wear;
- dishwasher heat;
- repeated use.
Cloudiness alone does not automatically mean unsafe, but if the bottle also becomes:
- cracked;
- warped;
- difficult to clean;
replace it.
Cracked Lids
A cracked lid can fail during shaking.
Replace:
- lid;
- bottle;
as appropriate.
Damaged Threads
If the lid no longer threads securely, leakage risk increases.
Do not keep using a bottle that requires extreme force to close.
Worn Gaskets
Signs include:
- leaks;
- loose seal;
- cracking;
- permanent deformation.
Some manufacturers sell replacement seals.
Replacement Parts
A bottle with replaceable:
- lid;
- whisk;
- gasket;
may offer better long-term value.
This can reduce the need to replace the entire bottle.
Odour Resistance
Stainless steel and glass generally resist absorbed odour well.
Some plastics may retain smells more easily.
But in most cases, persistent protein-shaker odour originates from:
- lid;
- seal;
rather than the bottle wall alone.
Staining
Strongly coloured powders may stain some plastics.
Examples may include products containing:
- turmeric;
- food colouring;
- berry pigments.
Staining is mainly cosmetic if the bottle remains clean and intact.
Transparent vs Opaque Bottle
Transparent
Advantages:
- see mixing;
- see liquid level;
- easier cleanliness inspection.
Opaque
Advantages:
- conceals stains;
- may look cleaner longer.
This is mostly personal preference.
Shaker Bottle and Supplement Dosing
Do not use the bottle’s visual markings as a substitute for following supplement instructions.
Measure powders using:
- provided scoop;
- weight measurement where appropriate.
A shaker bottle mixes the product.
It does not determine the correct dose.
Protein Powder Serving Size
The amount of protein powder you need depends on:
- diet;
- protein intake;
- fitness goals.
The size of the shaker should not dictate:
- how much protein you consume.
Bigger Shaker Does Not Mean Bigger Shake Is Better
A 1-litre bottle does not mean you need:
- multiple scoops.
Choose nutrition based on actual needs.
Can You Prepare Protein in Advance?
You can, but storage matters.
Once mixed, follow appropriate food-safety guidance based on:
- liquid;
- powder;
- additional ingredients.
Refrigerate when required.
A sealed shaker is not a preservation system.
Should You Put Powder or Liquid First?
Usually:
liquid first → powder second
works better.
Why?
If powder goes into a dry bottle first, it can stick to:
- base;
- corners.
Adding liquid first reduces this.
Basic Mixing Method
- Add liquid.
- Add powder.
- Insert mixing mechanism if removable.
- Close lid securely.
- Confirm cap is shut.
- Shake vigorously.
This simple sequence works for most products.
How Long Should You Shake?
Often:
- 10–30 seconds;
is enough.
Thicker formulations may need longer.
Do not assume a minute of violent shaking is necessary.
Shake Direction
A combination of:
- vertical;
- diagonal motion;
can help move liquid through the entire bottle.
The exact movement is not important.
Letting the Shake Rest
Some powders become smoother if allowed to sit briefly after initial mixing.
You can then shake again.
Follow product-specific guidance.
Foam
Certain protein powders create substantial foam when shaken.
This does not necessarily indicate poor mixing.
Foaming can depend on:
- protein type;
- additives;
- shaking intensity.
Allowing the drink to rest briefly may reduce foam.
Excessive Foam
If foam bothers you:
- shake less aggressively;
- use more liquid;
- let it sit.
A blender may actually create even more foam.
Clumps at the Bottom
Possible causes:
- powder added before liquid;
- insufficient liquid;
- bottle too full;
- poor mixing mechanism.
Try:
liquid first → powder → shake
before blaming the powder.
Thick Shakes
If your shake is very thick:
- increase liquid;
- choose larger bottle;
- consider powered mixer if truly necessary.
A small bottle packed with powder cannot mix effectively.
Nut Butter and Thick Ingredients
A standard shaker is not designed to properly blend:
- peanut butter;
- whole banana;
- oats;
- ice;
- frozen fruit.
Use a blender.
Do not force food pieces into a shaker and expect blender-like results.
Mixing Oats
Instant or very finely ground oats may disperse somewhat.
Whole rolled oats generally will not become smooth.
Choose a blender if texture matters.
Coffee and Protein Powder
Protein can be mixed with coffee, but be cautious about:
- liquid temperature;
- shaker heat rating.
Do not shake very hot coffee in a sealed bottle unless it is specifically designed for hot liquids.
Cool the liquid first.
Milk Alternatives
Protein powders can be mixed with:
- soy;
- almond;
- oat;
- other plant-based beverages.
These may alter:
- thickness;
- foam.
Cleaning requirements remain the same.
Shaker Bottle for Hydration
If you mainly use the bottle for:
- water;
- electrolytes;
you may prefer a model that functions equally well as a normal drinking bottle.
Look for:
- comfortable spout;
- larger capacity.
Shaker Bottle for Work
For office use, prioritize:
- leak resistance;
- subdued design;
- easy cleaning.
A bottle with removable powder storage can be useful if you want to mix the drink later.
Shaker Bottle for Travel
Useful features include:
- secure locking cap;
- compact shape;
- powder compartment.
If flying, remember that airport rules may affect carrying:
- liquids;
- powders.
Check current travel requirements.
Shaker Bottle for Gym Bag
The priorities are:
- Leak resistance
- Compact size
- Durable lid
- Easy cleaning
A beautiful bottle that leaks is unsuitable.
Shaker Bottle for Car Use
Check:
- base diameter;
- cup-holder compatibility.
Do not prepare or shake drinks while:
- driving.
Shaker Bottle for Cycling
A typical gym shaker may not fit bicycle bottle cages.
Cyclists usually use specialized:
- cycling bottles.
If you need a mixed sports drink on the bike, choose a bottle designed to fit your cage.
Shaker Bottle for Running
A standard shaker is not practical to carry during running.
Use:
- handheld running bottle;
- hydration belt;
- vest;
depending on distance.
The shaker is better for:
- before;
- after exercise.
Shaker Bottle in Hot Weather
In hot environments, consider:
- insulated stainless steel;
- ice-compatible wide mouth.
Plastic bottles left in extreme heat can become:
- warm;
- unpleasant to drink from.
Follow manufacturer storage recommendations.
Leaving a Shaker in a Hot Car
Avoid leaving:
- prepared shakes;
- supplements;
- plastic bottles;
in a very hot vehicle for prolonged periods.
Heat can affect:
- food safety;
- bottle materials;
- supplement stability.
Cold Drinks
If you prefer very cold protein shakes:
- insulated stainless steel may be useful.
Some people find cold drinks more pleasant after:
- hot workouts.
Condensation
Single-wall bottles containing cold liquid can develop external condensation.
This may make the bottle:
- slippery;
- wet inside bag.
Double-wall insulation reduces this.
Bottle Sleeves
A silicone or fabric sleeve can improve:
- grip;
- protection;
- condensation management.
Optional for most users.
Shaker Bottle Weight
Plastic is generally lightest.
Stainless steel is heavier.
For someone already carrying:
- gym shoes;
- towel;
- laptop;
a lighter bottle may be preferable.
Handle Comfort
If you carry a large bottle for long periods, a:
- loop;
- handle;
can be useful.
A 1-litre bottle becomes heavy when full.
One-Handed Drinking
Some users prefer a cap that can be opened with one hand.
Useful during:
- gym workouts.
But the mechanism should still close securely.
Straw Shaker Bottles
Some designs use:
- straw;
- sip tube.
This can be comfortable for hydration.
But thick protein shakes may not flow easily through a narrow straw.
Cleaning is also more complicated.
Straw Cleaning
If the bottle has a straw, use a proper:
- straw brush.
Protein residue can accumulate inside narrow tubes.
Do You Need a Shaker With a Straw?
Usually not for protein.
It may be useful if you also use the bottle primarily for:
- water;
- hydration.
Smart Shaker Bottles
Some products may offer:
- temperature display;
- mixing timers;
- app integration.
These are convenience features.
They do not improve the nutritional value of your shake.
For most people, they add unnecessary complexity.
Shaker Bottle With Battery Mixer
If choosing one, evaluate:
- battery life;
- charging port protection;
- motor cleaning;
- replacement parts.
Electronics increase the number of potential failure points.
USB Charging Ports
If the shaker is rechargeable, check whether the charging port is protected from:
- water;
- cleaning.
Never immerse electronic components unless the manufacturer explicitly allows it.
IP Ratings
Some electronic products may list water-resistance ratings.
Understand what they actually mean.
Water-resistant electronics are not automatically:
- dishwasher safe;
- submersible.
Follow official instructions.
Blender Bottles With Blades
Portable blenders use actual blades and are different from ordinary shaker bottles.
They may be able to process:
- fruit;
- ice;
depending on model.
They require much greater attention to:
- blade safety;
- charging;
- cleaning.
If all you need is protein powder and water, this is unnecessary.
Safety Around Blender Blades
Never place fingers near blades.
Switch off and disconnect power where possible before:
- cleaning;
- removing trapped ingredients.
Follow manufacturer guidance.
Can Children Use Shaker Bottles?
A simple manual shaker can be used like a normal bottle when appropriate.
But supplement drinks are a separate nutritional issue.
Do not assume products designed for adult sports nutrition are appropriate for children.
Protein Shakers and Pregnancy
The bottle itself is simply a container.
The important question is what is inside it.
Supplements during pregnancy should be assessed based on:
- ingredients;
- individual nutritional needs;
- clinician advice where appropriate.
Supplement Powders and Medication
Some supplements can interact with:
- medications;
- medical conditions.
The convenience of a shaker does not make every powder appropriate.
Review supplement use when medically relevant.
Cleaning After Milk-Based Shakes
These should be rinsed quickly.
Milk residue can produce strong odour.
Pay particular attention to:
- lid;
- gasket.
Cleaning After Plant-Based Shakes
Plant-based powders can also leave:
- thick residue;
- particles.
Use a brush around:
- corners;
- threads.
Cleaning After Sugary Drinks
Sugars can make surfaces:
- sticky.
Rinse promptly.
Dishwasher vs Hand Washing
Dishwashers are convenient.
Hand washing allows you to inspect:
- seals;
- grooves;
- residue.
Even dishwasher-safe bottles may benefit from occasional detailed:
- manual cleaning.
Avoid Abrasive Scrubbers
Very abrasive pads may scratch plastic.
Scratches can make the bottle:
- cloudy;
- harder to clean.
Use appropriate brushes.
How Often Should You Deep Clean a Shaker?
If used regularly:
- wash after every use;
- inspect seals and lid periodically.
A deeper clean is useful whenever:
- odour;
- visible residue;
develops.
You do not need an elaborate sanitizing routine if the bottle is washed properly every time.
Should You Replace a Smelly Shaker?
First:
- Clean lid thoroughly.
- Remove gasket.
- Deep clean.
- Dry fully.
If odour remains permanently embedded or the bottle is:
- heavily scratched;
- damaged;
replacement may be easier.
When to Replace a Shaker Bottle
Replace if:
- lid cracks;
- seal repeatedly leaks;
- plastic becomes badly damaged;
- threads no longer close securely;
- gasket cannot be cleaned;
- persistent odour remains;
- electronic mixing system fails and is not repairable.
Sustainability
A reusable shaker is generally more practical than repeatedly using:
- disposable cups;
- single-use bottles.
A durable simple bottle that lasts several years may be a better choice than frequently replacing complicated products.
Replaceable Parts Improve Longevity
Look for brands offering replacement:
- lids;
- seals;
- mixing balls.
This can extend product life.
Plastic vs Stainless Steel for Sustainability
Environmental impact depends on:
- manufacturing;
- durability;
- how long the bottle is used.
A stainless bottle used for many years may be very durable.
A lightweight plastic bottle may use fewer resources initially.
The most practical approach is:
buy one suitable bottle → use it for a long time
rather than constantly upgrading.
Do You Need Multiple Shaker Bottles?
Not necessarily.
One or two are enough for most people.
A second can be useful if:
- one is being washed;
- you carry multiple drinks.
Owning six nearly identical shakers adds little value.
Two-Bottle Routine
Some people benefit from:
Bottle 1
Water.
Bottle 2
Protein/electrolyte shaker.
This prevents flavours and residue from affecting your everyday water bottle.
Why a Dedicated Water Bottle May Be Better
Protein odour can persist in lids.
If you prefer plain water to taste completely neutral, keeping:
- separate water bottle;
- shaker;
can be practical.
Shaker Bottle for Protein Only
If this is the sole purpose, prioritize:
- medium capacity;
- simple mixing mechanism;
- wide mouth;
- easy cleaning.
No need for:
- giant hydration capacity;
- straw;
- smart display.
Shaker Bottle for Multiple Uses
If you also use it as a daily bottle, prioritize:
- comfortable drinking spout;
- larger capacity;
- bottle-holder compatibility.
Common Shaker Bottle Buying Mistakes
Buying Too Small
Insufficient room for mixing.
Buying Too Large
Heavy and inconvenient.
Prioritizing Compartments Over Lid Quality
Leak resistance matters more.
Choosing a Complex Lid
More parts can mean harder cleaning.
Ignoring Gasket Access
Hidden residue creates odour.
Buying a Motorized Shaker for Simple Protein Powder
Usually unnecessary.
Choosing a Narrow Mouth
Makes adding powder difficult.
Ignoring Cup-Holder Fit
Important for commuters.
Assuming “Leakproof” Means It Can Never Leak
Correct closure still matters.
Buying Stainless Steel Without Considering Weight
It may be much heavier.
Common Shaker Bottle Use Mistakes
Powder First, Liquid Second
Can increase clumping at bottom.
Filling to the Brim
Leaves no mixing space.
Forgetting to Close the Flip Cap
A classic mistake.
Shaking Carbonated Drinks
Can create pressure.
Shaking Very Hot Liquids
Can be dangerous.
Leaving Protein Residue Overnight
Creates strong odour.
Washing the Bottle but Ignoring the Gasket
Hidden residue remains.
Reassembling While Wet
Traps moisture.
Leaving Milk-Based Shakes Warm for Hours
Food safety matters.
Using the Shaker as a Blender
It cannot process whole foods properly.
How to Use a Shaker Bottle Properly
Step 1 — Add Liquid First
Use the amount recommended for your drink.
Step 2 — Add Powder
Avoid overfilling.
Step 3 — Insert Mixer
If the system uses a removable component.
Step 4 — Tighten Lid
Make sure threads align properly.
Step 5 — Close Drinking Cap
Confirm it clicks or locks.
Step 6 — Shake
Usually 10–30 seconds.
Step 7 — Check Texture
Shake again if necessary.
Step 8 — Drink
Consume according to the product and food-storage requirements.
Step 9 — Rinse
As soon as practical.
How to Choose a Shaker Bottle Step by Step
Step 1 — Decide What You Mix
Protein, electrolyte powder, meal replacement or multiple products?
Step 2 — Select Capacity
Choose enough room for:
- liquid;
- powder;
- air space.
Step 3 — Choose Material
Plastic, stainless steel or glass?
Step 4 — Choose Mixing System
Manual is enough for most users.
Step 5 — Inspect Lid Design
Leak resistance is critical.
Step 6 — Check Cleaning Access
Wide mouth, removable gasket and simple internal shape are valuable.
Step 7 — Consider Portability
Will it fit:
- bag;
- car;
- machine bottle holder?
Step 8 — Add Storage Only if Needed
Avoid unnecessary modules.
Step 9 — Check Replacement Parts
Useful for longer ownership.
A Simple Choice by Use
Protein Powder
Choose:
500–700 mL manual shaker with whisk or grid
Pre-Workout
Choose:
smaller 400–600 mL shaker
Meal Replacement
Choose:
larger 700 mL+ shaker with strong mixing system
Electrolytes
Choose:
simple larger bottle or shaker
Hot-Weather Gym Use
Consider:
insulated stainless-steel shaker
Office + Gym
Choose:
leak-resistant shaker with powder storage compartment if useful
A Simple Choice by Material
Lightweight and Affordable
Plastic.
Durable and Insulated
Stainless steel.
Taste Neutrality
Glass, accepting breakage risk.
A Simple Choice by Cleaning Priority
Look for:
- wide opening;
- simple lid;
- removable gasket;
- dishwasher-safe components where preferred;
- rounded internal base.
Avoid:
- complicated hidden channels.
A Simple Choice by Portability
Small Gym Bag
500–600 mL.
Everyday General Use
600–700 mL.
Large Hydration Needs
700 mL–1 L.
Choose the smallest size that realistically handles your normal drink.
Shaker Bottle Buying Checklist
Before purchasing, ask:
1. What will I normally mix?
Protein, electrolytes or thicker meal replacements?
2. How much liquid do I normally use?
Choose the capacity accordingly.
3. Is there enough extra space for mixing?
Do not size the bottle exactly to your final liquid volume.
4. Does the lid feel genuinely secure?
This is critical.
5. Does the drinking cap lock firmly?
Check before carrying it in a bag.
6. Is the mixing mechanism appropriate?
A manual whisk or grid is enough for most people.
7. Is the mouth wide enough?
Important for adding powder and cleaning.
8. Can I remove and clean the gasket?
A major hygiene advantage.
9. Are there hidden corners where residue can collect?
Simpler is often better.
10. Is the material appropriate for my routine?
Plastic, steel or glass?
11. Do I need insulation?
Useful in hot conditions or for longer storage.
12. Will it fit my gym bag and car cup holder?
Check dimensions.
13. Do I really need storage compartments?
Buy them only if you will use them.
14. Are replacement lids or seals available?
Useful for long-term ownership.
15. Is it easy enough to wash every day?
Possibly the most important practical factor.
The Physical Glow Takeaway
A good shaker bottle does not need to be complicated.
For most people, the most practical choice is:
a medium-capacity, wide-mouth bottle with a simple mixing mechanism, secure lid and easy-to-clean design.
Prioritize:
- capacity → enough room for your usual liquid plus mixing space;
- lid → secure enough to shake and carry without leaks;
- mixing mechanism → whisk ball or grid is sufficient for most powders;
- wide opening → easier powder loading and cleaning;
- gasket access → essential for preventing trapped residue and odour;
- material → plastic for light weight, stainless steel for durability and insulation;
- portability → fits your bag and normal bottle holders;
- cleaning → simple enough that you will wash it immediately after use.
Avoid buying features you do not need.
You probably do not require:
- electric mixing;
- multiple storage towers;
- smart displays;
- complicated lids;
to mix an ordinary protein shake.
And remember that even the best shaker bottle will smell unpleasant if protein residue is left inside it.
The most useful habit is:
drink → rinse → wash → dry open
rather than:
drink → close bottle → leave it inside the gym bag overnight.
Choose a shaker that removes friction from your routine.
It should make preparing and carrying your drink easier—not become another piece of gym equipment that requires more maintenance than it is worth.