Resistance Band Anchor Safety: Fraying, Door Anchors and Snapback
Resistance bands are among the most convenient tools for home workouts. They are lightweight, affordable, easy to store and suitable for a wide range of exercises.
A single band can be used for rows, presses, pulldowns, assisted stretching and selected rehabilitation exercises. Unlike large strength-training machines, resistance bands require very little space.
However, their simplicity can create a false sense of security.
A resistance band stores elastic energy when stretched. If the band tears, an attachment fails or an anchor suddenly releases, that energy can cause the band or its hardware to snap back toward the person exercising.
Injuries can include bruising, cuts and, in severe cases, eye injuries.
The most important aspect of resistance-band safety is not how much resistance the band provides. It is whether the band, attachment and anchor can remain secure throughout the exercise.
This Physical Glow guide explains how to inspect resistance bands for damage, choose appropriate anchor points, use door anchors correctly, prevent snapback and build safer band-training habits at home.
1. Why Can Resistance Bands Be Dangerous?
Resistance bands generate force as they stretch.
The precise relationship between stretch and resistance depends on the band’s material, thickness, geometry and construction.
When a stretched band is released normally, it contracts toward its original length.
If that release is unexpected, the movement can be fast and difficult to control.
Three Common Failure Scenarios
Band failure: The elastic material tears or breaks while under tension.
Anchor failure: The object holding the band moves, breaks or allows the attachment to slip free.
Attachment failure: A carabiner, handle, clip or connecting component detaches.
These failures can occur separately or together.
For example, a strong band may remain intact while an unsuitable door handle breaks under tension.
Similarly, a secure wall anchor cannot prevent injury if the band itself is badly damaged.
Why Snapback Matters
A stretched band stores elastic potential energy.
If the connection suddenly fails, some of that energy may accelerate the band or attached components.
The resulting impact risk depends on several factors, including extension, tension, mass, direction and the nature of the failure.
It is not possible to identify a universally safe stretching distance for every resistance band.
The manufacturer’s limits must guide use.
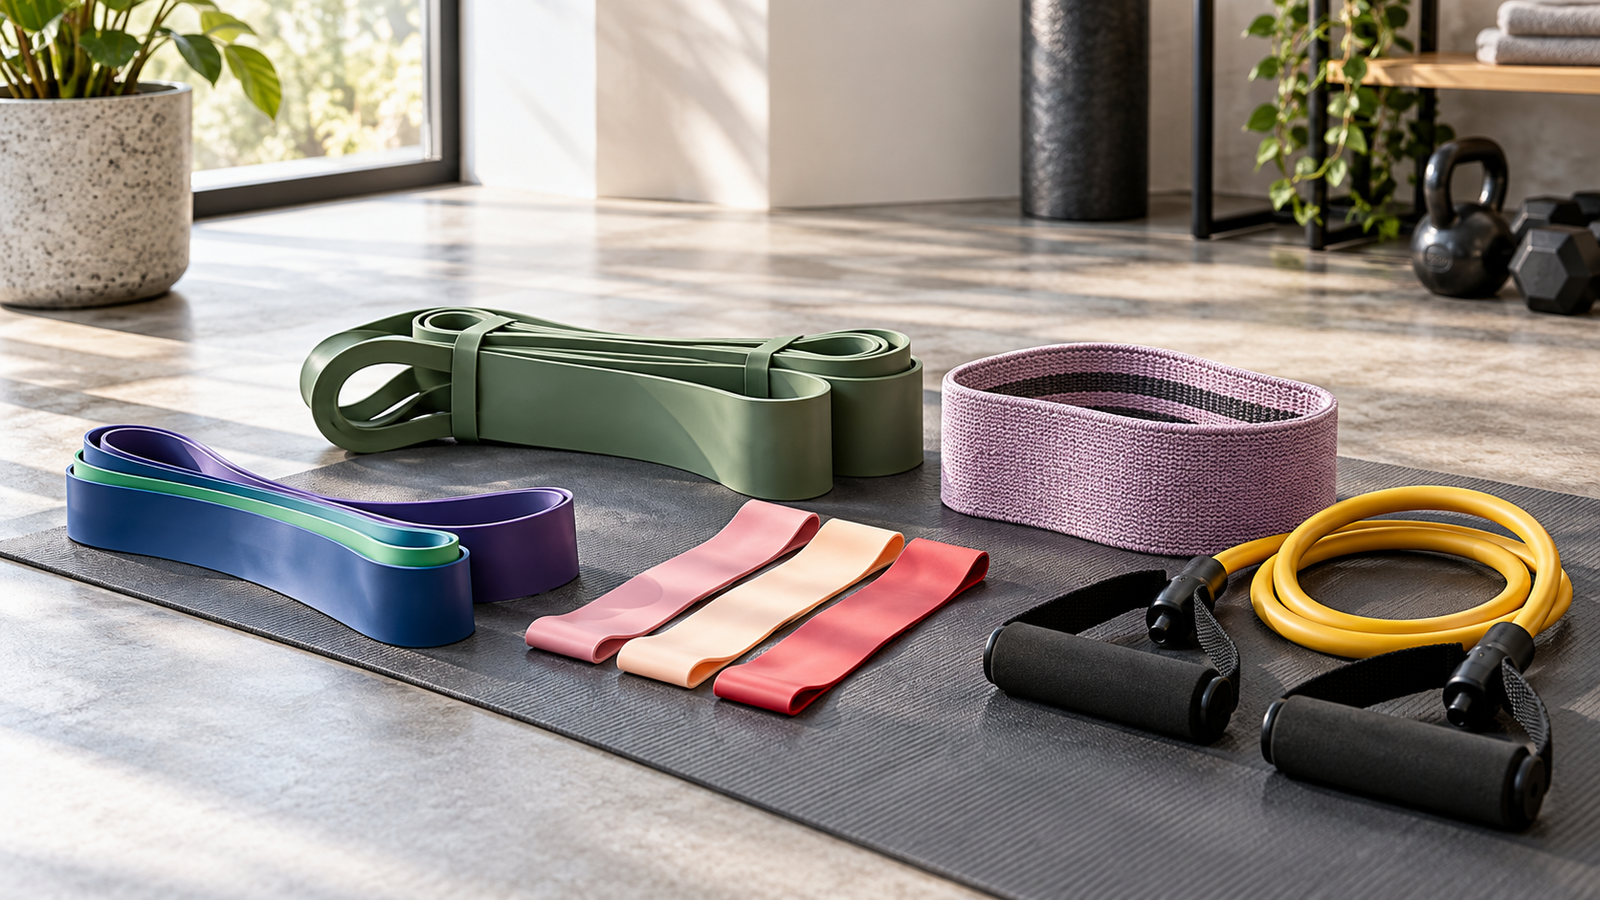
2. Understand the Different Types of Resistance Bands
Not every resistance band has the same attachment requirements.

Long loop bands
Closed-loop bands often used for assisted pull-ups, rows, presses and mobility exercises. Their safety depends on band condition and the attachment method.

Resistance tubes with handles
Elastic tubes with handles and sometimes clips or carabiners. Additional connection points introduce possible failure locations.

Mini-loop and fabric hip bands
Short loops generally used around the legs or other body parts for exercises such as lateral walks. Some are not intended for anchoring or substantial elongation.

Flat therapy bands
Flat elastic strips used in selected strengthening and rehabilitation programs. They require appropriate gripping or attachment methods.
The fact that one band format can be anchored to a door does not mean every other format can be used the same way.
Always check whether the manufacturer permits the intended attachment method.
3. Inspect the Band Before Every Workout
A visual and tactile inspection is one of the simplest ways to reduce the risk of preventable equipment failure.
It should happen before the band is placed under significant tension.
What to Look For
- Small cuts or nicks.
- Cracks.
- Tears around the edges.
- Thinning or worn sections.
- Sticky or degraded material.
- Unusual colour changes.
- Damage around handles or attachment points.
- Exposed internal components.
- Loose clips or fittings.
Inspect the entire working length of the band rather than checking only the middle.
Why Small Cuts Matter
A small cut may become a point where mechanical stress is concentrated.
Repeated stretching can cause the damage to worsen.
Do not assume a band remains safe simply because it has not broken during previous workouts.
Inspect Under Good Lighting
Look along the band in a well-lit area.
You can examine its normal, relaxed condition and gently check for visible surface damage without stretching it toward your face or exceeding the product’s limits.
What If the Band Looks Damaged?
Stop using it.
Do not attempt to make a damaged elastic band safe by tying a knot over the tear or covering it with adhesive tape.
Replace the band according to the manufacturer’s guidance.
4. Fraying: What Does It Mean for Band Safety?
Fraying refers to damage or separation of material at the edges or surface.
It is especially noticeable in certain fabric-covered resistance bands, but different band materials can show different types of deterioration.
Fabric Bands
Potential warning signs include:
- Loose or broken threads.
- Damaged stitching.
- Separation around seams.
- Worn elastic sections.
- Uneven stretching.
A loose decorative thread does not necessarily mean the entire product is about to fail, but damage to structural stitching deserves serious attention.
If you cannot determine whether the damage affects strength, do not continue exercising with the band.
Latex or Rubber Bands
Warning signs may include:
- Surface cracks.
- Small tears.
- Splitting edges.
- Permanent deformation.
- Hardening or loss of elasticity.
- Sticky or visibly degraded surfaces.
Resistance Tubes
Pay particular attention to the areas where the tube connects to handles or other fittings.
The tubing may appear intact in the middle while the ends are deteriorating.
Can Fraying Be Repaired?
A damaged resistance band should generally be replaced rather than repaired for continued exercise use.
DIY repairs cannot reliably restore the manufacturer’s intended strength or safety.
5. What Is a Resistance Band Door Anchor?
A door anchor is an accessory intended to secure a compatible resistance band or tube using a suitable door.
Many designs include a strap and an enlarged padded stopper.
The stopper is positioned on the opposite side of the closed door, while the strap passes through the door gap.
When used correctly with a suitable door and according to the manufacturer’s instructions, the stopper is retained by the closed door.
Simplified door-anchor arrangementConceptual illustration only. Actual installation direction, door requirements and attachment positions vary by manufacturer. It is not a substitute for the product manual.
Why the Door Matters
The anchor itself is only one component of the system.
The door, hinges, frame, latch and direction of pull also affect safety.
A high-quality anchor attached to a weak or unsuitable door may still fail.
6. How to Use a Door Anchor More Safely
Always follow the instructions supplied with your exact anchor.
The following principles help identify important safety considerations.
Step 1: Check Door Compatibility
Confirm that the door is suitable for the product.
Some anchors specify particular door types, minimum construction requirements or restrictions.
Do not assume that lightweight hollow-core doors or damaged frames are appropriate.
Step 2: Follow the Required Door Orientation
Many door-anchor systems are intended to be used with a door that closes against the direction of pulling.
This can help prevent the door from opening toward the user.
However, the correct orientation depends on the product design.
Follow the manufacturer rather than improvising a universal setup.
Step 3: Position the Stopper Correctly
The stopper must be placed in the position specified by the manufacturer.
An incorrectly positioned stopper may slip through the gap or fail to remain secure.
Step 4: Close and Secure the Door
Ensure the door is fully closed and latched as required.
Make sure nobody can unexpectedly open it during exercise.
Step 5: Inspect the Strap
Look for wear, cuts, damaged stitching and loose fittings.
Step 6: Check the Setup Before Training
Follow the manufacturer’s pre-use checking procedure without placing your face or body in the potential recoil path.
Do not use sudden, forceful jerks as a test.
Step 7: Maintain Control During Exercise
Use smooth, controlled movements.
Avoid extending the band beyond its permitted range.
7. Which Doors Should You Avoid?
Not every door can safely support resistance-band training.
Potentially unsuitable options include:
- Loose or damaged doors.
- Doors with weak or unstable frames.
- Doors that cannot close securely.
- Doors that other people may open unexpectedly.
- Lightweight doors not approved for the anchor system.
- Doors with hardware that interferes with proper placement.
What About Sliding Doors?
Do not assume a standard door anchor is compatible with a sliding door.
The load direction and closing mechanism differ from those of hinged doors.
Use a product expressly designed and approved for that installation.
Glass Doors
Ordinary glass doors should not be treated as suitable resistance-band anchors unless a qualified manufacturer explicitly specifies a compatible system and installation.
Wardrobe and Cupboard Doors
Household cabinet doors are generally not engineered as exercise anchors.
Avoid improvising with them.
Bathroom Doors
Moisture, slippery flooring and door construction can introduce additional hazards.
A bathroom is not automatically an appropriate workout location.
8. Why Door Handles Are Risky Anchor Points
A common home-workout shortcut is looping a resistance band around an ordinary door handle.
This may appear convenient, but the handle may not be designed to resist exercise loads.
Potential problems include:
- Handle detachment.
- Lock mechanism failure.
- Screw loosening.
- Band slippage.
- Damage to the door.
- Unexpected snapback.
A handle can feel solid during normal door operation while being unsuitable for repeated resistance-band loading.
Do not assume that ordinary household door hardware is a rated exercise anchor.
Use a compatible purpose-designed anchor system installed according to its instructions.
9. Can You Anchor Bands to Furniture?
People sometimes attach bands to beds, sofas, tables or chairs.
However, ordinary household furniture may move or tip when pulled.
Lightweight Furniture
A chair may slide or fall.
Heavy Furniture
Even a heavy object may shift if the force is applied at an unfavourable angle.
Wheeled Furniture
Office chairs and mobile storage units should not be used as improvised anchors.
Beds
A bed frame may contain components not designed for lateral exercise loads.
The weight of the mattress does not establish that every attachment point is safe.
Better Approach
Use a manufacturer-approved resistance-band anchor or an appropriately rated gym fixture.
Do not treat an object’s apparent weight as proof of its suitability.
10. Wall Anchors and Fixed Gym Attachments
Wall-mounted anchors can offer a dedicated attachment point, but their safety depends on the complete installation.
Important factors include:
- Anchor design.
- Rated working load.
- Fastener type.
- Wall material.
- Installation method.
- Direction of loading.
- Condition of the mounting surface.
Concrete vs Masonry vs Plasterboard
These materials have different fastening requirements.
A fixing suitable for sound structural concrete may not be suitable for hollow masonry or plasterboard.
Why Professional Installation May Matter
Incorrect installation can result in failure even when the anchor itself is strong.
For permanent anchors carrying significant training loads, follow the manufacturer’s installation requirements and use a qualified installer when appropriate.
Avoid Unrated Hooks
Decorative hooks and ordinary wall hardware are not necessarily designed for exercise forces.
A product’s weight-bearing claim must be relevant to the intended loading direction and dynamic use.
11. Understanding Band Stretch Limits
Resistance bands become stretched during use.
However, the permitted degree of elongation varies by product.
Some manufacturers describe maximum extension as a multiple or percentage of the band’s original length.
Others specify a different operating range.
Why Stretch Limits Matter
Overstretching can increase stress on the material and may contribute to failure.
Do Not Guess the Maximum
A band that feels capable of stretching farther is not necessarily rated for that extension.
Consider Exercise Geometry
The anchor location and your distance from it determine how much the band stretches.
Moving farther from the anchor increases extension and may increase tension.
Use Suitable Resistance
If an exercise requires you to exceed the manufacturer’s recommended extension to reach the desired resistance, choose a different band or exercise setup.
Do not use overstretching as a substitute for selecting appropriate resistance.
12. Why Resistance Band Colours Are Not Universal
Resistance bands are frequently colour-coded.
You may encounter yellow, red, green, blue, black or other colours.
However, there is no universal colour-to-resistance system across all manufacturers.
A red band from one brand may offer a different resistance profile from a red band made by another.
Resistance Depends on More Than Colour
Factors include:
- Material.
- Band thickness.
- Width.
- Length.
- Construction.
- Degree of stretch.
What Should You Compare?
Read the product’s resistance information.
Some bands display an approximate resistance range, while others use manufacturer-specific levels.
These figures may be measured under particular extension conditions.
Why This Matters for Safety
Selecting a band solely by colour can lead to unexpected resistance.
A band that is stronger than expected may be difficult to control, while a weaker one may be stretched excessively.
Use the actual specifications rather than colour alone.
13. How to Prevent Resistance Band Snapback
Preventing snapback requires reducing the likelihood of failure and avoiding dangerous body positions if failure occurs.
Inspect Equipment
Check the band, anchor, handles and connectors.
Avoid Sharp Surfaces
Do not stretch bands over rough metal edges, sharp corners or abrasive surfaces unless the manufacturer explicitly permits a protective attachment method.
Use Compatible Components
Do not connect random clips or handles that may not be rated for the intended loads.
Avoid Excessive Stretching
Remain within the manufacturer’s limits.
Maintain Controlled Movement
Avoid sudden jerking, violent pulling or releasing a fully stretched band.
Position the Body Carefully
Avoid placing your face or eyes directly in the likely recoil path of a stretched band or attachment.
Maintain Personal Space
Make sure nobody else is standing in a potential snapback path.
Use Eye Protection When Appropriate
For activities with significant eye-injury risk, suitable protective eyewear may reduce harm. It does not replace proper equipment and anchor safety.
14. Why Band Direction Matters
The direction of the pulling force affects the anchor.
A setup that appears secure under one loading direction may behave differently when pulled sideways or upward.
Horizontal Pulling
Exercises such as rows create forces generally directed toward the person exercising.
High Anchor Pulling
Pulldowns may involve forces directed down and away from an elevated anchor.
Low Anchor Pulling
Certain curls, raises and other exercises may create upward or diagonal forces.
Why It Matters
An anchor must be suitable for the direction and magnitude of the applied forces.
Do not assume that an attachment approved for one configuration can safely be used in every other position.
Check the equipment instructions for allowable attachment height and load direction.
15. Resistance Band Safety for Assisted Pull-Ups
Assisted pull-ups introduce particular hazards because a stretched band may be positioned near the user’s feet, knees or face.
A band used for assistance must be suitable for that purpose and compatible with the pull-up station.
Main Risks
- Band slipping off the support.
- Foot losing contact with the band.
- Improper band positioning.
- Band tearing.
- Loss of balance when entering or leaving the band.
- Uncontrolled recoil.
Safer Principles
Use a band specifically intended for assisted pull-ups.
Follow the manufacturer’s attachment method.
Use a stable, appropriately rated pull-up station.
Maintain control when entering and leaving the assisted position.
Avoid improvising attachments to unverified household fixtures.
Alternatives
A purpose-built assisted pull-up machine or appropriately programmed progression may be preferable for some users.
People who are unable to enter or exit the band safely should not rely on the setup without qualified supervision.
16. Band Safety During Rehabilitation Exercises
Resistance bands are commonly used in physiotherapy and rehabilitation.
However, rehabilitation exercises are not automatically risk-free.
Why Lower Resistance Still Requires Care
Even a light band can cause injury if it snaps toward the face or if an attachment fails.
Exercise Selection Matters
People recovering from injury may need controlled resistance, movement range and exercise positioning.
Follow Professional Guidance
If a physiotherapist prescribes band exercises, follow the recommended resistance, attachment method and progression.
Avoid increasing difficulty simply because the exercise begins to feel easy.
Stop for Unusual Symptoms
Pain, dizziness, sudden weakness or other concerning symptoms should prompt stopping the exercise and seeking appropriate advice.
A resistance band is an exercise tool, not a substitute for individualized medical assessment.
17. Storing Resistance Bands to Reduce Damage
Storage conditions can affect elastic materials over time.
The exact recommendations depend on the band material and manufacturer.
Avoid Unnecessary Heat
Do not routinely leave bands in very hot locations, such as inside a vehicle exposed to direct sunlight.
Protect From Direct Sunlight
Prolonged exposure to sunlight may degrade some elastic materials.
Avoid Sharp Objects
Keep bands away from tools, exposed screws and sharp equipment edges.
Do Not Leave Bands Under Tension
Store bands in the relaxed condition specified by the manufacturer.
Keep Them Clean
Follow the product’s cleaning instructions.
Aggressive solvents or unsuitable chemicals may damage some materials.
Check Before Reuse
A band stored for months should be inspected before the next workout.
Storage does not guarantee that its condition remains unchanged.
18. When Should You Replace a Resistance Band?
There is no universal replacement interval for every resistance band.
Service life depends on the material, frequency of use, storage, exposure and handling.
Replace the Band if You Notice
- Cuts or tears.
- Cracks.
- Structural fraying.
- Unusual thinning.
- Damaged handles.
- Loose connectors.
- Significant permanent deformation.
- Manufacturer-defined signs of wear.
Should You Wait Until It Breaks?
No.
A band should be removed from service when damage raises doubts about its integrity.
Can You Keep Using an Old Band That Looks Fine?
Age alone does not always determine failure risk, but older bands deserve careful inspection.
Follow any replacement or service-life instructions provided by the manufacturer.
What About Warranty?
A warranty does not necessarily mean a product is safe for continued use throughout the entire warranty period.
Physical condition and proper usage remain essential.
19. What to Do if a Band or Anchor Fails
If a band snaps or an anchor detaches during exercise, stop immediately.
First, Move Away From the Equipment
Do not continue the workout with damaged components.
Check for Injury
Minor skin contact may cause localized bruising or discomfort.
However, impacts involving the face or eyes can be serious.
Eye Injuries Need Particular Attention
If a resistance band or attachment strikes the eye, seek urgent medical evaluation.
Do not rub or press on the eye.
Even when the injury initially appears minor, internal eye damage may not be obvious.
Inspect the Entire Setup
Determine whether the failure involved the band, anchor, attachment or supporting structure.
Do not reuse any component whose integrity is uncertain.
Do Not Recreate the Failure
Avoid repeating the same exercise to see whether the equipment fails again.
Use properly rated replacement equipment and review the setup before returning to training.
20. A Pre-Workout Resistance Band Safety Checklist
Use this checklist before starting an anchored resistance-band exercise.
Resistance band safety check
0/10The band has no visible cuts, cracks or structural fraying.The handles, clips and connectors are undamaged.The band is suitable for the exercise and intended extension.The anchor is manufacturer-approved for this application.The supporting door, wall or fixture is suitable and secure.The pull direction complies with the anchor instructions.The exercise area is clear of sharp edges and obstacles.Nobody is standing in the potential recoil path.My face and eyes are away from the likely snapback direction.I can start, perform and finish the movement under control.
Resolve any unchecked safety items before using the anchored resistance band.
Reset checklistCompleting this checklist cannot certify that an anchor or structure is safe. Manufacturer requirements and professional installation guidance take priority.
21. Choosing Resistance Bands and Anchors for Home Workouts
When comparing resistance bands, it is useful to look beyond colour, price and advertised resistance.
| Buying factor | What to verify |
|---|---|
| Band construction | Material and intended exercise applications |
| Resistance information | Manufacturer-specific resistance at stated extension |
| Maximum stretch | Clear limitations on elongation |
| Handles and connectors | Compatibility and condition |
| Anchor system | Suitable for the intended door or fixture |
| User instructions | Installation, exercise and inspection guidance |
| Replacement policy | Warranty and available replacement components |
| Material sensitivities | Latex content where applicable |
| Storage guidance | Environmental and maintenance requirements |
| Price | Value relative to durability, specifications and support |
Latex vs Non-Latex Bands
Some people have latex allergies and require appropriate alternatives.
A product described as latex-free should be verified through manufacturer information.
Fabric vs Rubber Bands
Fabric hip bands may be comfortable for selected lower-body exercises.
Rubber loops and tubes may be more versatile for other movements.
However, material type alone does not establish superior strength or safety.
Choose an Appropriate Anchor
If your intended workout uses a door anchor, select a compatible system and verify that the door meets the manufacturer’s requirements.
Do not assume any inexpensive accessory will work safely with any band.
Compare Product Options
Physical Glow’s Best Resistance Bands in India: Top 5 Formats for Home Workouts guide compares several resistance-band formats, including long bands, loop sets, fabric bands and exercise tubes.
That commercial guide helps compare products. This article focuses specifically on anchor compatibility, equipment condition and preventing snapback injuries.
22. Common Resistance Band Safety Mistakes
Mistake 1: Using a Damaged Band Because the Tear Looks Small
Small defects may become larger under tension.
Mistake 2: Anchoring Bands to Door Handles
Ordinary handles are not necessarily rated for exercise loads.
Mistake 3: Using a Door That Can Open Toward You
Follow the manufacturer’s required door orientation and securing method.
Mistake 4: Overstretching the Band
Stay within the product’s specified extension limits.
Mistake 5: Standing in the Recoil Path
Avoid placing your face or eyes where a failed band or attachment could strike.
Mistake 6: Mixing Unverified Components
Random clips, handles and anchors may not be compatible.
Mistake 7: Assuming Stronger Resistance Is Always Better
Excessive resistance may reduce control and increase stress on the setup.
Mistake 8: Using Furniture as an Anchor
Household furniture may move, tip or break.
Mistake 9: Ignoring Attachment Wear
Handles and clips require inspection just as bands do.
Mistake 10: Leaving Bands in Extreme Heat
Unsuitable storage conditions can contribute to material deterioration.
Mistake 11: Continuing After Equipment Slips
Unexpected movement is a reason to stop and reassess.
Mistake 12: Using a Band Without Reading Its Instructions
Anchor compatibility and stretch limits vary across products.
23. Frequently Asked Questions
Can resistance bands snap during exercise?
Yes. Elastic bands can fail due to damage, overstretching, ageing, manufacturing defects or other factors.
Are door anchors safe for resistance bands?
A compatible door-anchor system can be used as intended when the door, anchor and setup meet the manufacturer’s requirements. No setup is risk-free.
Can I attach resistance bands to a door handle?
Ordinary door handles should not be assumed suitable for resistance-band loading. Use an approved anchor system.
Which side of the door should the anchor go on?
Follow the exact product instructions. Many systems require the door to close against the pulling direction, but designs vary.
Can a resistance band damage a door?
Yes. An unsuitable anchor or excessive loading may damage the door, frame, hardware or surrounding structure.
Is a hollow-core door safe for band exercises?
Do not assume so. Follow the anchor manufacturer’s door requirements.
Can I use a resistance band on a glass door?
Not unless a specifically designed and approved system explicitly permits it. Ordinary glass doors should not be used as improvised anchors.
What causes resistance bands to fray?
Mechanical wear, abrasion, repeated stretching and environmental exposure can contribute to deterioration, depending on material and construction.
Is a frayed resistance band still safe?
Structural fraying is a reason to remove the band from use. Do not rely on an improvised repair.
Can resistance bands cause eye injuries?
Yes. Snapping bands or detached attachments can strike the eyes and cause serious injury.
How can I prevent resistance band snapback?
Inspect equipment, use compatible anchors, remain within stretch limits, control movements and avoid positioning your face in the recoil path.
Are fabric resistance bands safer than rubber bands?
Neither category is automatically safer. Construction, intended use, condition and correct application matter.
Are resistance band colours standardized?
No. Resistance colour systems vary among manufacturers.
Can I tie resistance bands around furniture?
Avoid using unverified furniture as an anchor. It may move or fail under load.
How often should I replace resistance bands?
Follow manufacturer guidance and replace bands when damaged or deteriorated. There is no universal replacement interval.
Can I repair a torn resistance band?
A torn resistance band should generally be replaced rather than repaired for exercise use.
Are resistance bands safe for beginners?
They can be useful for beginners when appropriate resistance, technique and equipment are used. Anchored exercises still require proper setup.
Can I use a resistance band for assisted pull-ups?
Use a band specifically suitable for assisted pull-ups and follow the manufacturer’s attachment and safety instructions.
Should I stretch a band as far as possible for more resistance?
No. Follow the maximum extension specified by the manufacturer.
What should I do if a band hits my eye?
Seek urgent medical assessment. Do not rub or press on the eye.
24. Final Verdict: Secure the Anchor Before Increasing Resistance
Resistance bands offer a practical way to train in small spaces, but their safety depends on much more than choosing the correct resistance level.
Before every workout, inspect the elastic material for cracks, tears, thinning and fraying.
Check handles and connectors.
Make sure the anchor is designed for the intended exercise and compatible with the supporting door or structure.
Avoid attaching bands to ordinary door handles, movable furniture or unverified wall fixtures.
Respect the manufacturer’s stretching limits and maintain controlled movement throughout the exercise.
Most importantly, avoid positioning yourself or another person in the likely path of a failed band or attachment.
A resistance band workout should begin with a secure setup, not a stronger band.
Careful inspection, appropriate anchors and controlled exercise technique can reduce avoidable risks while allowing resistance bands to remain useful tools for home strength training.
Editorial References and Further Reading
- U.S. Consumer Product Safety Commission — Product safety information and recall notices. Search by exact equipment brand and model when checking reported defects.
- UK Health and Safety Executive — Work Equipment and Machinery — General principles concerning equipment suitability, maintenance and inspection.
- American College of Sports Medicine — Exercise guidance, resistance training principles and professional resources.
- American Academy of Orthopaedic Surgeons — OrthoInfo — Patient education on musculoskeletal injuries and exercise-related safety.
- Manufacturer instructions for your particular resistance band, tube and anchor — The primary reference for permitted extension, load ratings, attachment methods and inspection requirements.
Physical Glow Editorial Note: This article provides general fitness-equipment safety education. It does not certify any door, anchor, wall fixture or resistance band as safe for a particular load. Follow manufacturer instructions, use qualified installation assistance when required and seek appropriate medical attention for injuries.